Starrett 196

This is a “Dial Test Indicator Back Plunger Set”. A friend gave it to me for minor services rendered.

It appears to be complete, as all the recesses are occupied.

The indicator has a plunger rod sticking out the back, with a travel range of 0.200. It is threaded 5-44 UNF, and there are 3 buttons to fit.

One of the two rods is threaded 1/4-28 and fits the C-clamp device. The other is threaded 10-32 and fits the bar for the tool post of any lathe larger than my Sherline. However, 10-32 is the standard tooling thread for Sherline, so I can mount assemblies to the lathe or mill slides with just a simple spacer and a T-nut.

Many set-ups are of course possible. Here is one to check the tangent of the headstock angle, before making a taper cut.

And here is a set-up to check the interior profile of a small bore, using the rocker gizmo.

Posted in Alignment, Measuring | Leave a comment

Meek 44

A friend recently bought this reel. It was missing 3 screws, two for the foot and one on the backplate.


The foot was held on by two “rivets’ made from nails. I had to disassemble in order to get at the nails. Then I made 3 new screws from 18% nickel silver. There is some discussion of screw slots here.

The new screws are shiny. Maybe they will look right in another 100 years.


Many parts have milgrain decoration.


The shaft, ratchet, pawl, and spring are magnetic. I assume the the two bushes are bronze. The rest may be nickel silver.


It weighs 6.6 oz. The end plates are 2.275 diameter, and the pillars are 1.00 long. The spool end plates are just 1.625 diameter, clearly meant for a silk line.

Posted in Classic Reels | 1 Comment

Knob Selection

While finishing this reel, I made a selection of knobs.

Briar, Brazilian Tulip, Rosewood, Alternative Ivory, Turcite X, Black Acetal (on reel).
Macro shot of the wood knobs: Briar, Tulip, Rosewood

Update 2 March 2015: Two more, ebony and maple burl.

Update 5 Sept 2015: PEI knobs, unfilled semi-transparent (Ultem 1000) and glass filled (Ultem 2300).

Posted in Knob | 3 Comments

Rotary Tumbling

Since I began making reels in 2011, I have been using a vibratory tumbler to finish parts. This is effective for aluminum and brass reel parts when used with”plastic pyramids” media. A typical part would get 4 hours of vibration, and then would have a dull finish which was easily brightened by manual work with fine grit wet sandpaper. The main function of tumbling is to uniformly remove sharp corners left on the machined parts.

About a year ago, Reelmaker Anders bought a rotary tumbler and told me that it was an improvement over vibratory tumbling. Rotary tumblers are used by ammunition reloaders and jewelry makers. They differ from rotary rock tumblers in that they run at higher speed and use stainless steel media.

So I have recently bought a rotary tumbler, the “Platinum Series” by Frankford Arsenal.

The barrel is big; it has a 4 inch diameter opening at each end and a volume of 1.5 gallons. It also has a built-in timer. Tumbling is done wet; you nearly fill the barrel with water.

This tumbler is marketed to ammunition reloaders and comes with 5 pounds of media which are stainless pins of .040 inch diameter and 0.27 inch length. I felt that this was not the right thing for reel parts, so I have substituted a “jewelry mix” of 5/32″ balls, 5/32″ ball-cones, and 1/8″ diagonals.

I have been running parts 2 hours and getting the same sharp edge relief that I got from vibration. Further, the parts are bright right out of the tumbler and I can run more parts at one time.

Update 23 Dec 2020: The stainless media is good for bronze and steel parts, but not so for aluminum. It is a matter of density: Solid aluminum 0.10 lbm/in^3, solid bronze 0.27, solid steel 0.28, stainless media 0.18, plastic pyramids 0.03. An aluminum reel spool will “float” on top of the stainless media and not get well polished. It gets worse as you add more water to the mix because that makes the aluminum part even more buoyant. So for aluminum I am using a product from Surf Tumbling Media. It is “Green Plastic Tumbling Media General Purpose – Deburring Pyramid Shape – 1/4 inch”. My tumbling barrel is sufficiently filled with a 2.5 pound bag. Leaves a nice matte finish so the anodized spool is not reflective.

Posted in Abrading | 7 Comments

Ferrule Set


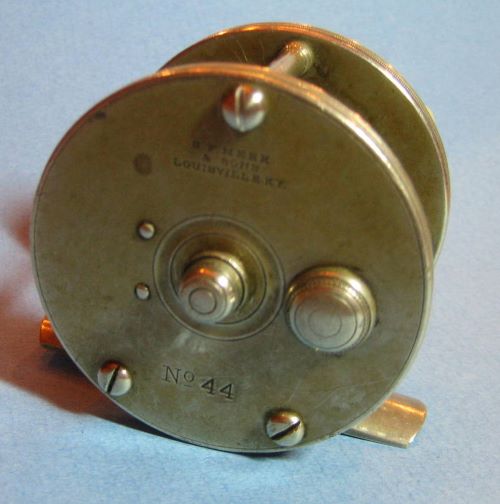
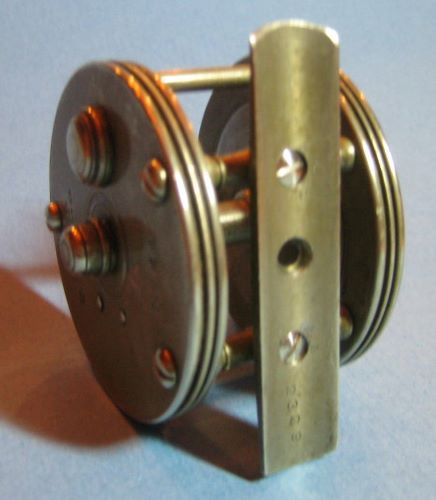
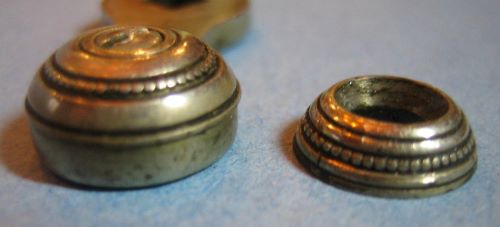
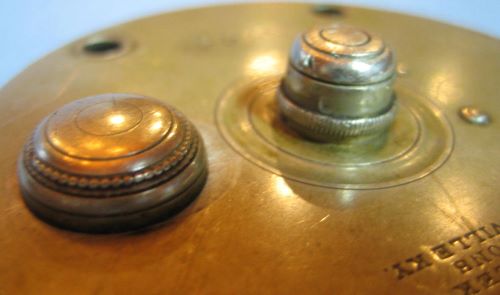
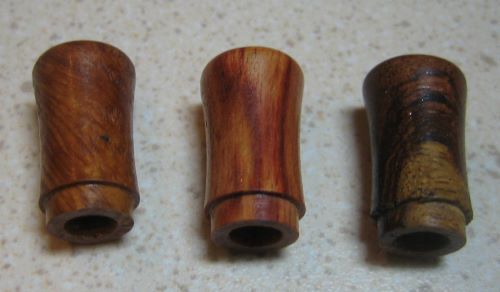
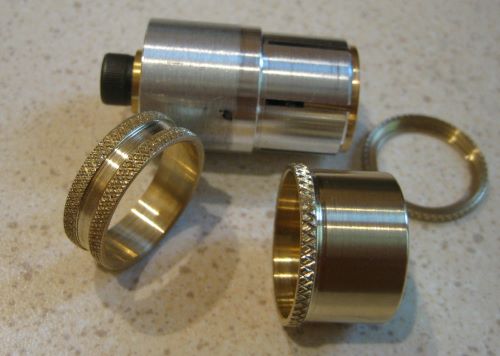
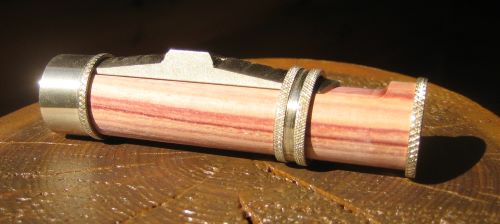
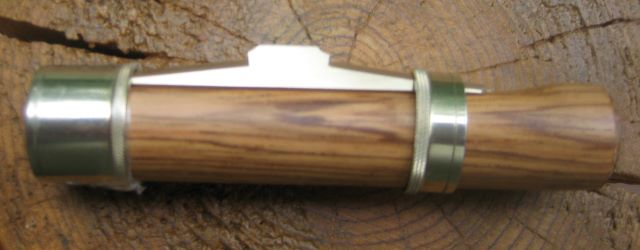
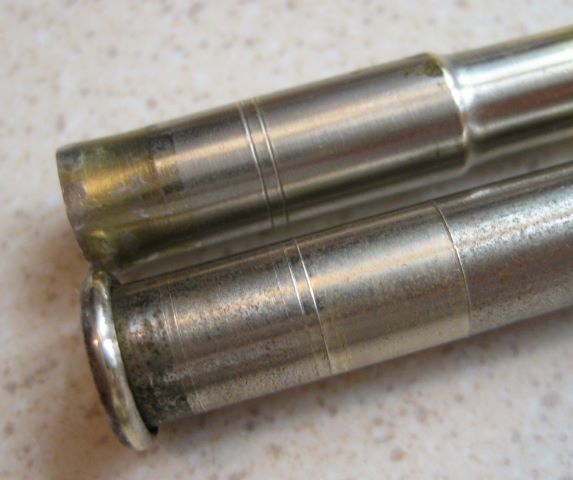
I made this ferrule set from Duronze (c642 bronze). Duronze is perhaps the next best thing to drawn nickel silver, and probably better than machined nickel silver. It is size 11 (11/64 inch) for a 3 weight rod.
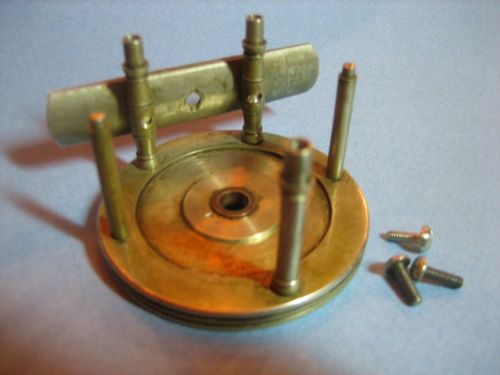
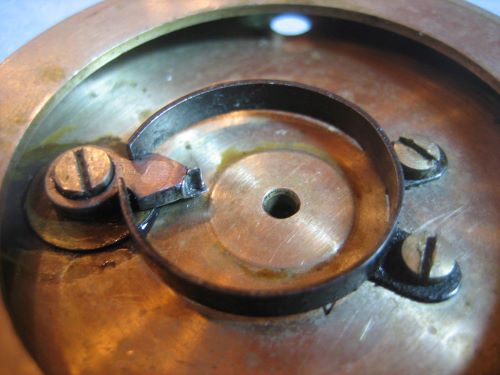
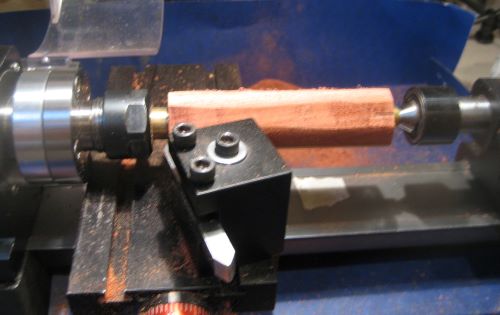
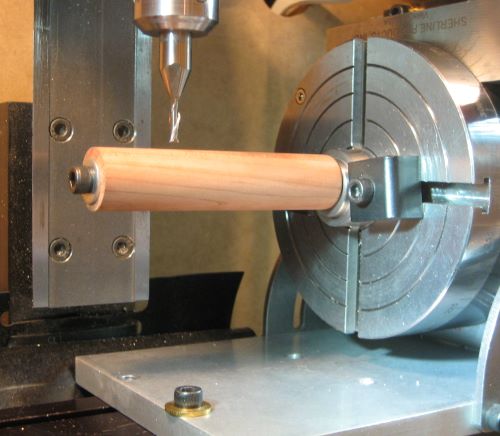
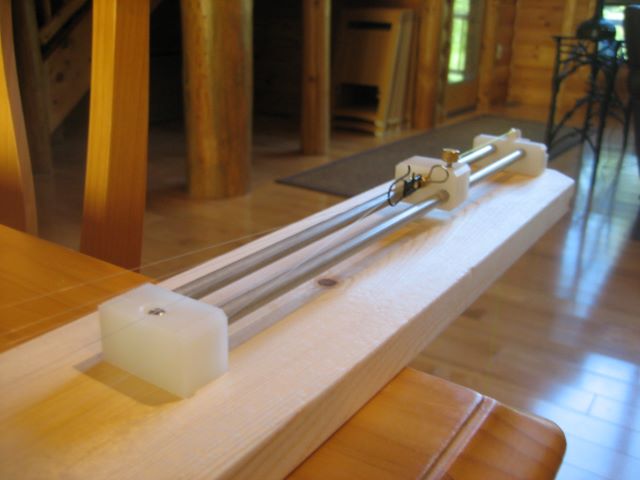
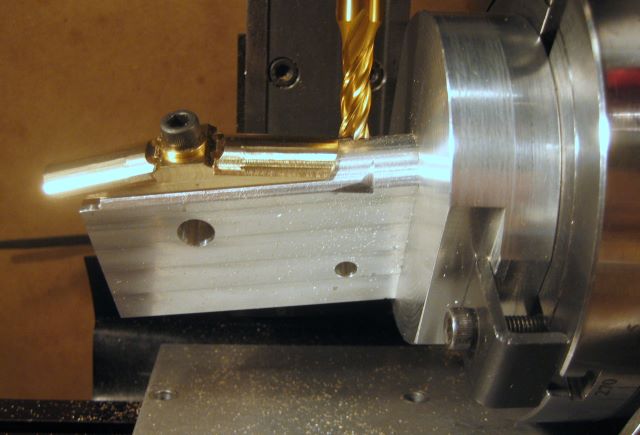
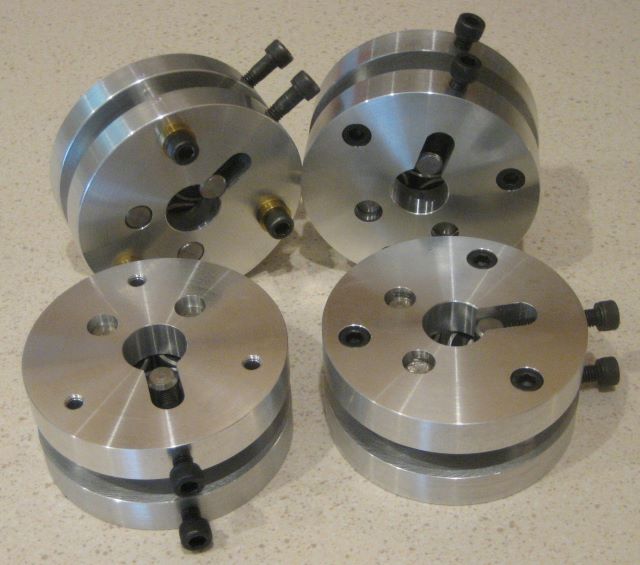
These are straightforward lathe parts: turning, drilling, reaming. I only used my mill at the last step, to saw the six slots. Many rodmakers already have Sherline lathes and use them for various rod finishing operations. They might also like to turn ferrules, so I have been trying to imagine a fixture for the lathe that would hold a ferrule in 6 positions while sawing.

Update 8 Sept 2014: Mark S. has asked for further details. He is one of those who finishes rods with a Sherline lathe and would like to do more.

Tutorial: The only instructional information that I have seen is Bogart’s ferrule presentation at 2013 Grayrock. This is available at the Grayrock web site. But this info is for drawn NS ferrules. So here is some additional info on machining ferrules. I am no expert at this point, the photo above is my first effort. And these haven’t been used yet on a rod.

Dimensions: There is a Excel spreadsheet that you can find by Googling “step down dimensions”. These are what I used, except that I needed to provide 11/64 for the bamboo at the male end as well as at the female. So the male here is 1/64 oversize at the bamboo end.

Duronze: You can buy c642 bronze from On Line Metals or from McMaster-Carr. Minimum diameters are 3/8 and 5/16 respectively, so it is a little more convenient to go with McM.

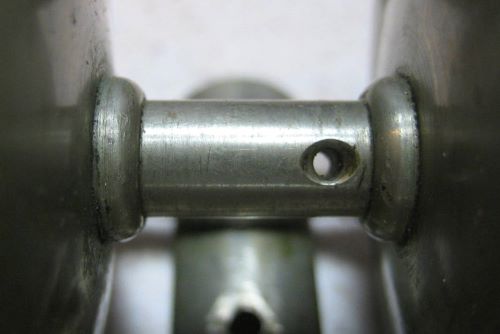
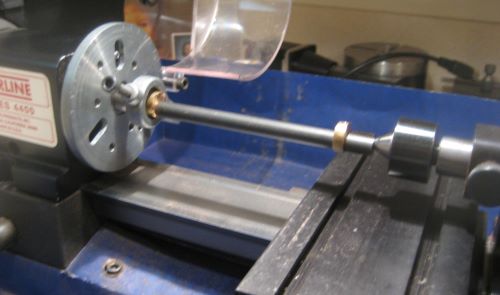
Work holding: You will find collets more satisfactory than a chuck, it seems to me that the part is more rigidly held. And a collet that lets you feed stock through the spindle is a real plus. I use an ER-16 setup that I have blogged about. Use the “Categories” list at the right (Tools – Work Holding) to locate my post on “Improved ER-16 Collet Chuck”.

Turning tools: A brass type HSS tool is the right thing. It has a round nose and no top relief, so it is very easy to grind from a blank. Look at the McMaster catalog page to see the shape. I recommend that you grind it yourself, because Duronze quickly takes the edge off a turning tool and you must frequently re-sharpen. The long skinny rod deflects while turning, so it is easy to end up with a taper. Do some lathe filing to remove the taper. When approaching the final diameter (plus .001 or .002) on the male slide, I use a 4 cut pillar file. Be sure you know how to read the .0001 vernier of a micrometer.

Drill bits: Like brass, bronze wants to “grab” your drill bits. I bought some special bits for brass from McM and I think that they are somewhat better than the standard bit. You only need 3 for one size of step down ferrule, or just 2 if you do not step down. While drilling, back out frequently to clear chips.

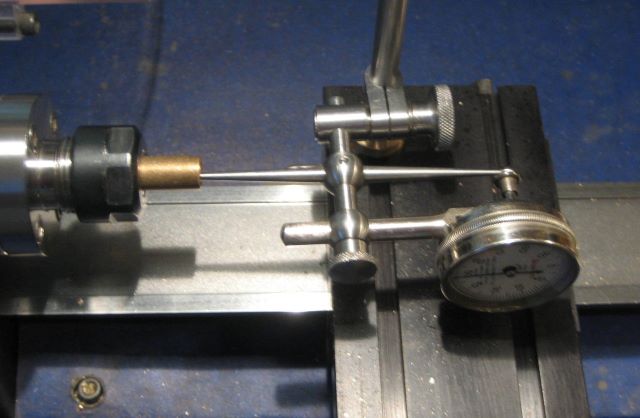
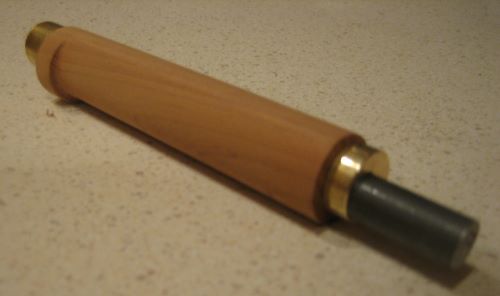
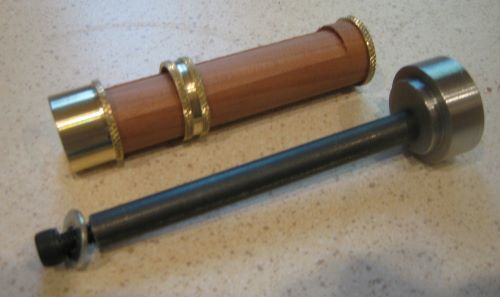
Reamer: You will want to ream the female slide. The Ebay store Zorotools has a suitable 11/64 reamer for just a few dollars. I drilled about .006 undersize before reaming. Go slow, back out a few times and let the work cool off. The Sherline M0 tailstock taper just cannot handle the torque. Cleaning M & F tapers with alcohol helps some, but I keep a narrow open end wrench handy for extra boost. The standard end wrench is too wide; my solution is a special wrench that bicycle mechanics know about, for removing pedals from English bikes. (See thinwrench.com or Ebay, 9/16 size.)

Lapping the female slide: Read Bogart’s presentation. You need a brass rod and some valve lapping compound. I have not yet tried final fitting of the male, but I don’t plan to buy a Sunnen hone. Oct. 9: I have had some feedback warning against the use of lapping compound on copper alloys. Note that Bogart laps with Clover Compound (carbide), which he considers to be non-embedding. Still, not everyone in the business thinks that lapping is a good idea for ferrules.

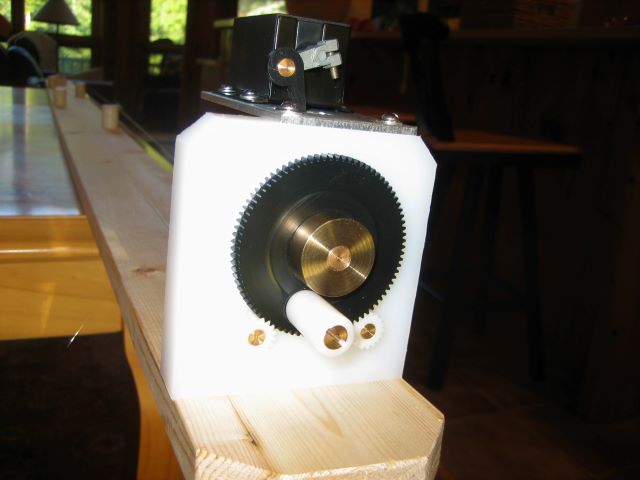
Slitting: Somebody needs to invent a fixture for doing this on the lathe. Sherline P/N 2045 (index block) might be part of this fixture.

Posted in Ferrules | 5 Comments

Reel Seat

This week I have been attempting to make a reel seat of the “cap-and-ring, mortised insert” type, but only with partial success.

The trim ring (cork check?), sliding ring, and cap are simple lathe parts.  I chuck a 1 inch long rod, turn the two rings and part off.  Then I bore the inner diameter of the cap.  The expanding mandrel here holds the cap while I turn the outer surface.

You can see here that I am having trouble with the diamond knurl.  It is correct on the cap, but shows multiple strikes on the ring.  The material for these parts is c642 aluminum bronze.

The wood insert (cherry wood practice blocks here) is easily drilled on my Sherline lathe, using a 4 jaw chuck to hold the square block.  Since I don’t have a wood lathe, I also use the Sherline to make the blank round.

Here I am turning with a tool steel bit meant for brass.  Both ends of the blank are piloted on brass parts that fit the bore.  The brass part at the head end has drive spurs to grip the wood.

One way to make the mortise is by turning on an off-center mandrel.  Here is the setup with my mandrel.

Again, the brass part at the head end has drive spurs.

And this is the mortised insert, still on the mandrel.

The turned mortise covers an arc of slightly more than 180 degrees on the surface of the insert.  So the cap fits very loosely.  I would like a better fit and decided to try a milled mortise also.

Here is the setup for milling.  This mandrel has no outboard support, but I found the insert to be held level within .005 inch.

This is the milling mandrel and a milled insert.

I don’t think that it is as attractive as the turned insert, but it is a better fit for the cap.  The arc of the milled groove is only 100 degrees.

Update 28 Aug 2014: I have settled on milling the mortise, but using a ball end mill. Here is a dry assembly with a Brazilian Tulipwood insert.

Update 3 Nov 2014: Here is a good example of bronze reel seat hardware, with 45 years of patina development.

Photo courtesy C. Bogart.

Posted in Rods | 8 Comments

Furling Machine

For more than 10 years, I have made and fished furled leaders, using the method of Claude Freaner. I have now made a fixture/machine to assist in the process.

The machine is hand cranked, so I no longer need to drag out a drill, extension cord, and stop watch. It has a mechanical counter to keep track of turns. Also, it has two parallel spindles, so I do not have to unfold the thread layout for the first twist, then re-fold for the furling.

I have a set of 36 DP gear cutters for making reel ratchets, so the Delrin gears here are 36 DP. Speed-up ratio is 84/17.

The head end of the machine might be considered a “Walton Engine”.

Here is the back side of the head, showing the crank that operates the counter.

During twisting and furling, the leader is tensioned by a hanging weight.

The knob on top of the slider block locks it in place while the thread loops are made.

To date, I have only fished leaders made of fly tying thread. I find these completely satisfactory and durable. Once I tried using 2 pound test monofilament, but would get kinks during unfolding and refolding. With this improved tensioning system, I am now able to work with monofilament. Haven’t fished it yet.

Posted in Line/Knots | 10 Comments

Top of the Foot

I delivered the Bronze Frame Reel (blog post of July 14) to a rodmaker acquaintance, who was making himself a new 3 weight rod just for this reel. He had chosen a CRNS reel seat from REC Components, but found that the reel foot did not fit. Other REC reel seats, like CRN, did fit but he wanted the smaller seat with his small rod (and I agree). To troubleshoot, he sent me the CRNS seat.

Here I have attempted to engage another of my “standard” reel feet with the seat, and indeed it does not fit. The foot is just barely captured by the cap and ring, and will certainly fall off the rod if fished. My fly rods have locking reel seats, and they had never been a problem. I checked this reel seat with several commercial reels, and found that some fit and some did not.
The problem seems to be with the AFFTA Reel Foot Standard, which specifies a foot that is 2.5 inches long (A), .525 wide (D), has a .35 bottom radius (B), is .04 thick at the tip (E), and slopes up at 7.5 degrees (C). The problem with this drawing is that it says nothing directly about the top of the foot; what should its radius be? I assumed that it should be .39 inch (= B + E) and prepared a fixture accordingly. Up until now, there had been no reported problems.

The CRNS is probably typical of many cap-and-ring seats. The wood insert starts as a rod of .64 inch diameter, and then is “mortised” on one side to create the .35 inch radius that fits the bottom of a foot. This “mortise” is .08 inch deep at the centerline. The reel foot (at the centerline) becomes .08 thick at about 0.3 inch from the end of the foot.

It wasn’t until I drew this sketch that I could see the problem: my .39 inch top radius isn’t going fit inside a ring that is .64 or .65 diameter. The correct top radius should be .32 inch.
So I re-made my foot fixture, moving the upright part by .07 inch relative to the base.

Here I am using the modified fixture to make a new foot for the Bronze Frame Reel. I mill the top radius with cuts in the axial direction.
And the new foot is quite secure in the CRNS seat.

Anyone who who owns one of my reels and cannot fit it onto the rod of his choice, please contact me to arrange a rework of the foot.

Update 2 Aug 2014: After checking a number of reel seats, I find that the smaller top radius is not a universal solution. For locking reel seats, the .39 top radius seems to be a better fit. Also for round wood inserts with pocketed butt caps. For a mortised wood insert, it depends on how deep the mortise is.

My conclusion is that the AFFTA standard is defective, in that it does not specify the top radius. To illustrate, consider a foot that is .042 thick at the center of the tip. If the top radius is 0.32, then the tip thickness at the edge is .013 inch. But if the top radius is .40, then the tip is .045 at the edge. Both of these feet meet the standard, but would likely need different reel seats.

Update 18 Aug 2014: I have modified my fixture to allow cutting any top radius.  The upright post can now be positioned relative to the base.

Posted in Foot | Leave a comment

Ferrule Shrinking

On May 7 I made a post about electroplating of nickel. This can be a protective finish for reel parts, but it can also be used to increase the diameter of a male rod ferrule that is loose. I was discussing this with C. Bogart at the recent Grayrock meeting, and he pointed out that the nickel goes on in a soft condition, so the fix may be temporary. He referred me to J.E. (Jed) Dempsey, who said that a better approach is to shrink the female ferrule with a roller device, similar to a tubing cutter.

I wanted to know if this really worked, so I made such a device, shown below. It uses 3 ball bearings as rollers.

Also in the picture is a scrapped ferrule set donated by RKP. I re-sized the ferrule set for a loose fit, and then worked on it with the roller device for about 20 minutes.

The fit was indeed tightened. I suspect the the female was reduced by a few tenths of 0.001 inch.

The rollers also raised a small welt on the female, seen here on the right side of the picture (two decorative grooves were already on both sides of this ferrule set). The welt can be rolled down by further work with the device, and then sanded away. (Update 20 July 2021: I have recently been advised that rolling down this ridge may be a mistake. See the post of 20 July 2021, “Ferrule Shrinking: Avoiding a Ridge”.)

As I sit here finalizing this post, I realize that this ferrule set may be plated brass rather than nickel silver. That is why the copper color is showing through. So this still needs a trial with 18% nickel silver.

Update 19 July 2014: Yesterday I got the chance to use this device on a female ferrule of high quality, hard drawn nickel silver tubing. It worked; the ferrule fit changed from loose to perhaps a little too tight. I was surprised how little effort/time was involved, compared to the brass ferrule.

Update 15 July 2015: I have had a batch of tools made and am selling them. Contact me for details.

Here is the prototype (left rear) and three tools from the batch.

Posted in Ferrules, Forming | 4 Comments

Bronze Frame Reel

I made this reel for an acquaintance from the “Grayrock” rod builders meeting.

It is really the same design as the Brass Frame Reel that I recently posted, but downsized for WF3F and 30 yards backing. It would also hold a WF4F, but no backing.

It is somewhat wide for a trout reel, and that is because I wanted to make it from bronze (vs. brass) and the largest round bar that I could buy in small quantity was 2.5 inch diameter. The front end ring and rear end plate are c544 phosphor bronze, which is easy to machine.

The foot is c954 aluminum bronze, which is also relatively easy to machine. This alloy comes in “as cast” condition, and this has caused me to research casting technology as a possible time/material saver. I am thinking that the foot may be a good candidate for casting, but not the front end ring.

Weight is 4.5 oz.
Update 29 Oct 2014: Here is a second example of the design, but with a rosewood knob.

Posted in My Reels | 2 Comments