
Ferrule shrinking tools are $100 plus $10 Priority Mail shipping, or $110 total.
To order, you can Paypal to the address on the “Contact” page of this blog, or else send me a personal check. To get my mailing address, request by Email.
International shipping is of course higher, recently about $40 to Europe or Australia.
You will find a postage calculator at postcalc.usps.com. Enter your country and “View Flat Rate Boxes”. Box size is “Small Flat Rate”.
Depending on your country, you may have to pay “landed cost” tax when the package arrives.
It is a simple hand operated tool, one hand on the tool and the other on the bamboo below the female ferrule. Turning the rod (radial screws slightly tightened) works down the diameter of the female ferrule. Stay a little back from the welt and from the moisture plug. Twist several times, remove and test the fit. If still loose, repeat with slightly tighter screws.
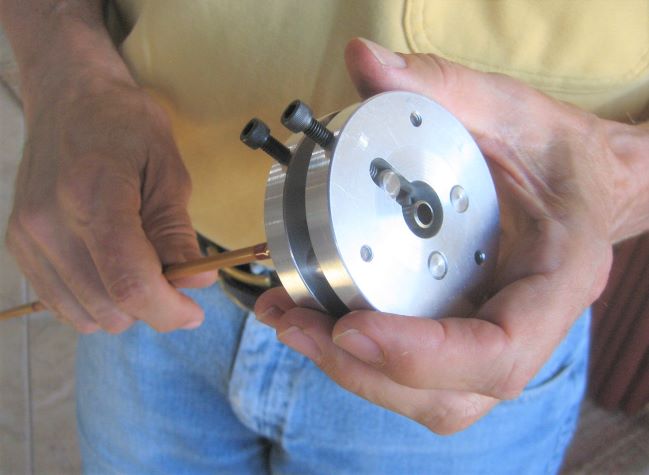
The two radial screws will have to be a bit more than finger tight in order to achieve a shrink, but not nearly as tight as you would use to set a fastener. They are #10-32 size, and require a 5/32 inch Allen wrench (not included). A 4 mm wrench will also fit. Proceed cautiously the first time that you use the tool; several iterations of {tighten screws – twist tool – test fit} will take much less time than trying to fix an excessive shrink.
It cannot hurt anything to start the shrink process with the ferrule parts clean. Rub the male with denatured alcohol, and the inside of the female as well (use a Q-tip).
There is a discussion of tool use here: classicflyrodforum.com/forum/viewtopic.php?t=152406. Two guys report cosmetic damage from using the tool. I once did surface damage on a ferrule, but could repair it by sanding.
You may need the skill of abrading a male ferrule to final fit, as it is easy to shrink the female a little too much.
As of May 2024, I have several in stock.
- FAQ
Q1. How is this different from crimping with a 3 jaw chuck?
A1. When crimping, you bring the material to the stress level that causes permanent deformation and you end up with a ferrule that is deliberately out-of-round. With this tool, it is my belief that the stress level that allows the diameter to be “spun” down is somewhat below permanent deformation and the ferrule is made more nearly round. I cannot prove this, but my before-and-after measurements indicate that roundness is improved.
Q2. Can this be used on a ferrule that is still on the rod?
A2. Yes. In fact, that is best way to use the tool because you can get a better grip on the bamboo than on the ferrule.
Q3. Will this process damage a blued finish?
A3. Probably. Do not undertake shrinking unless you have a way to restore the bluing.
Q4. Will it otherwise mark the ferrule?
A4. That depends a lot on the hardness of the ferrule. I have had all but one emerge clean; that one had a ridge between the bearing tracks (which did not overlap, probably a mistake). I was able to fix the flaw by abrasion.
Q5. Can I shrink a male ferrule?
A5. No. The closed end of the ferrule is a rigid point that cannot be shrunk. Similarly, you cannot shrink a female over the moisture plug or too close to the welt. I would stay 3/64 inch back from these.
Q6. What is the size range of ferrules?
A6. The tool will close down to 10/64 inch, the O.D. of a number 8 ferrule. It will open to 25/64 inch, the O.D. of a number 23 ferrule.
For more information on the ferrule shrinking tool, see these articles:
