
Below is some correspondence from Leo. When I have needed to make curved surfaces on reel feet, I have used my mill with either a rotary table fixture or a ball end mill. Leo shows how to do the same tasks with his lathe. The education here is making custom fly cutters. For milling operations, he has made custom vises to hold the work.
Hi Dave,
I have made a few fixtures to make machining of reel feet a little more convenient. Maybe theses are of interest to you and others who make reels.
The first is a fixture block with a clamping slot on one side. On the bottom of the block is a tenon which fits snugly into a t-nut slot on the milling table, making sure the block is in line/perpendicular with the x and y axis. Two allen bolts clamp the block to the milling table using two t-nuts.
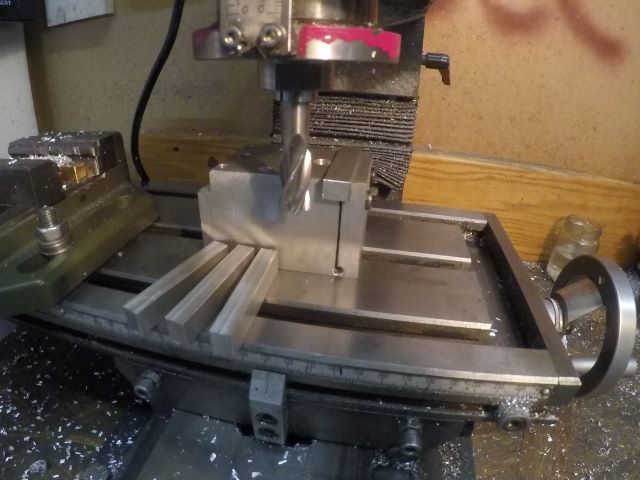
The reel foot blank, after being milled to the correct width, gets clamped in the slot to face off the ends.
If I had a matching ball nose end mill, I could now also machine the inside radius to fit the reel seat, but I wasn’t able to find one for a reasonable price.
After that, the blank gets clamped in the other fixture which mounts on the lathe cross slide. There the inside radius gets machined with a long fly cutter, which receives support from the tail stock at the rear end. This way the inside radius can be made using the lathe’s power feed, leaving quite a good surface finish. One can either hold on to some kind of beverage and watch the lathe do the work, or when making several reel feet sand off the machining marks of the previous one, while the next one gets cut. Huge time saver!
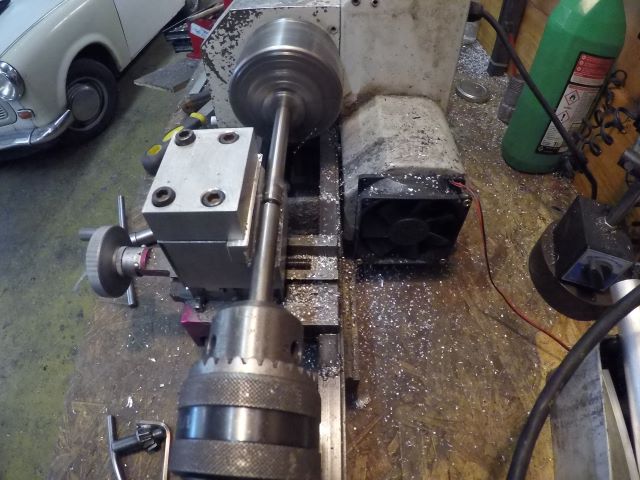

The fixture indexes on the cross slide via a tenon on the bottom and bolts to a long t-nut with to threaded holes.
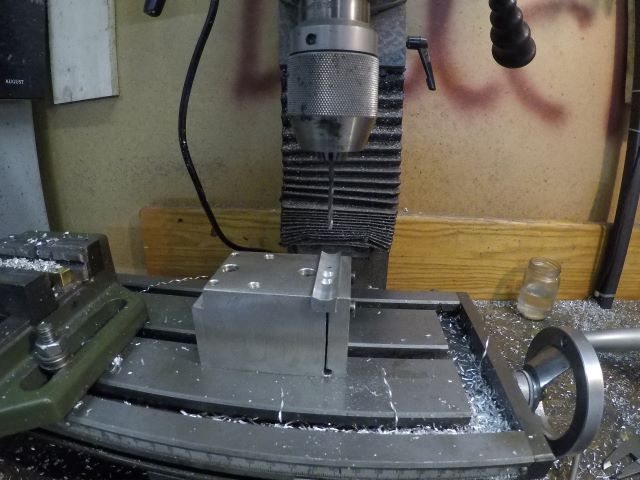
Afterwards, the blank goes back to the slot in the fixture block to drill the mounting holes for bolting it to the reel frame.
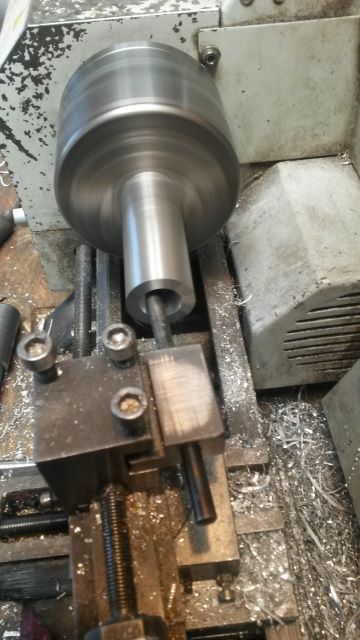
Now, using one of the holes, the blank gets bolted to an arbour to machine the conical outside radius.
After that, the blank gets clamped to the other side of the milling block to use a fly cutter to machine the radius to match the outside of the reel frame.

I made these fixtures from scrap aluminium blocks I had laying around. It took me the better part of a saturday to make the fixtures, but now it is quite easy to make reel feet. The pieces get held securely, so no more parts shooting into an earth orbit. Also with the fixtures made from aluminium, the parts don’t get scratched, dented or otherwise damaged.
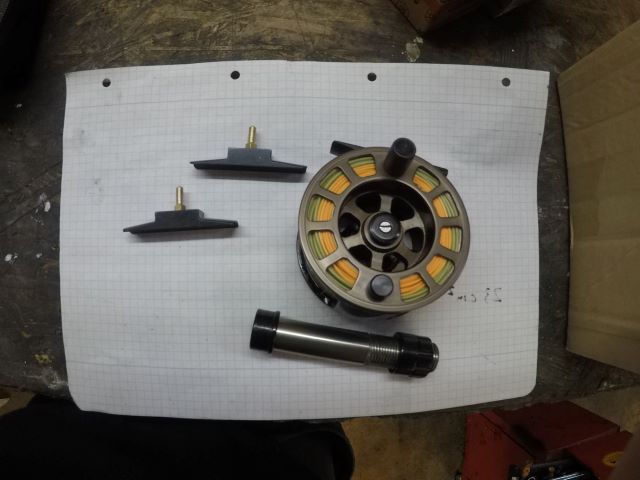
There are four reel feet blanks in most of the pictures, because I needed one to replace the foot of reel No.3(because the one made for this reel wasn’t to AFFTA specs and that bothered me), two will be fitted with a pointer to serve as alignment guides when glueing reel seats to rod blanks(this idea came from the bamboo book by Garrison and Carmichael), and the fourth reel foot is for a future project. Reel No.3 has received some anodising and coloring in the meantime.
If you want, you can share this on your blog. Might be time for me to start blogging as well.
Best regards from Germany!
Leo
___________________________________
Leo,
Your use of “fly” cutters for radii is most interesting. Are the cutting edges just a ground scrap of “drill rod” (hard steel small diameter)?
Dave
___________________________________
Hi Dave,
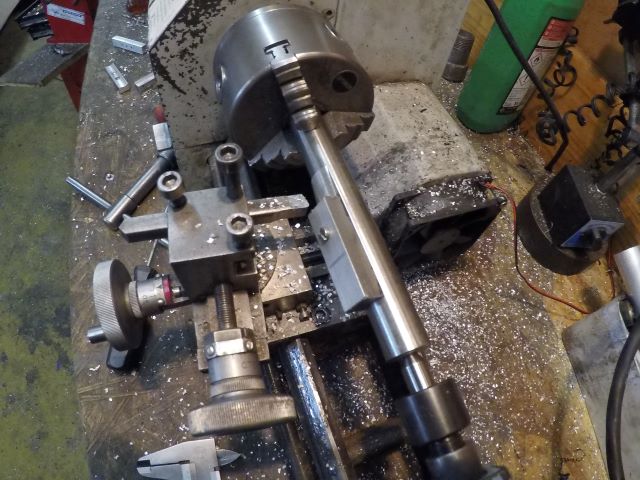
There is a group shot of my fly cutter/boring bar holders. Usually there should be more cutters/boring bars around, but I destroyed one or two and a few others just disappeared and I can´t find them.
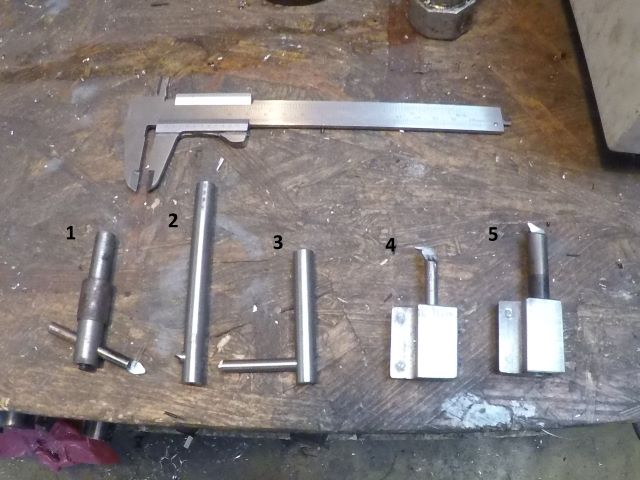
The cutter “1” is for surfacing, and I think I made this one some day because I needed to get a specific job done at that day, so the overall appearence of the arbor resembles the urgency of that situation. It just had to work, as it still does, but no time was wasted on good looks or a specific tool angle, just “some” angle so the grub screw holding the insert clears the work.
“2” can either be used as a boring bar in the mill, or when machining reel feet in the lathe, but it can also be held in the boring bar holder “5” for inside threads or similar work.


“3” is the short version of “2”, mostly used in the milling machine when the extra length of “2” isn´t needed. Less length, less chatter.
“4” and “5” are boring bar holders for the lathe. I made them from leftover steel blocks. One holds 6mm cutters made from drill rod, the other holds 10mm cutters or can be combined with “2” or “3”.

I hope this helps you understand my fly cutter/boring bar tooling.
Leo
