
I have made prototypes of two sizes of my “Fixed Spindle Reel” (see post immediately preceding this one), and am now starting the first reel for a customer. Also, I have committed to deliver a plan set by the end of October. This plan set will include step-by-step instructions for the more complex parts.
The Rear End Plate is the most complex part of the reel. As I am making one this week, I am taking pictures that illustrate the step-by-step instructions.
Many of these steps are repeated for the Front End Ring.
Step 4: Rounding corners on the bar stock. This allows turning on the lathe.
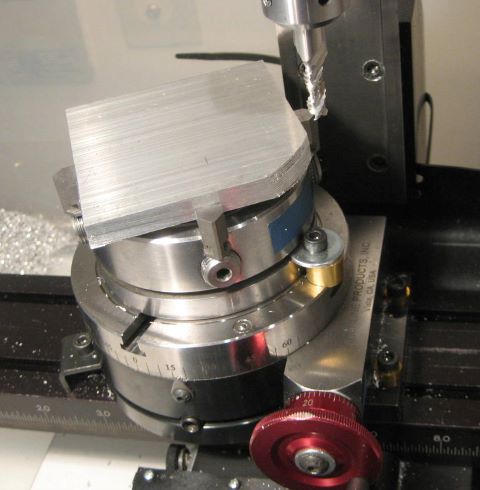
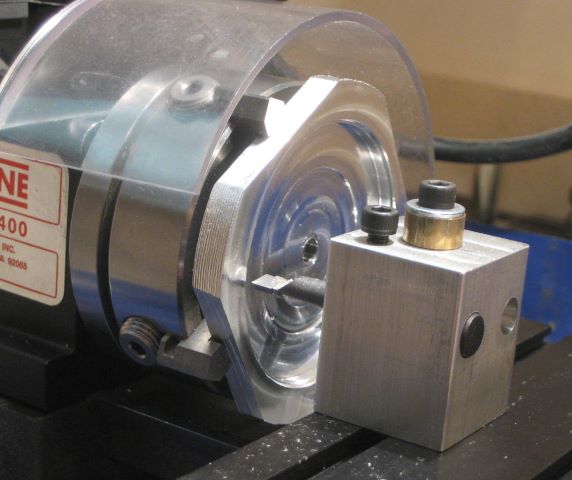
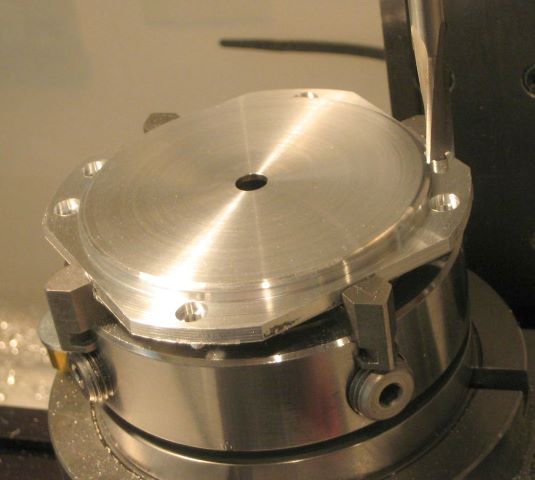
This 4 jaw chuck is a good milling vise, but only if it is restrained from angular motion (see bolt, washer, and brass spacer).
Step 5: Flatten the top. I do not have/use a fly cutter.

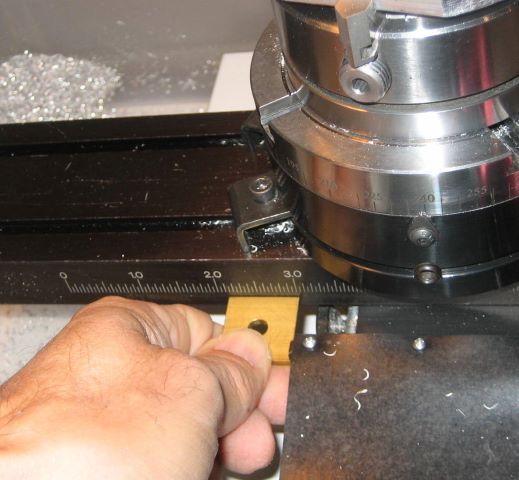
Step 6: Find X and Y positions by reading the engraved scales on the mill, in addition to the handwheels. These scales lack pointers, so my pointer is a brass square pushed against a way cover support. It works on the Y axis also.
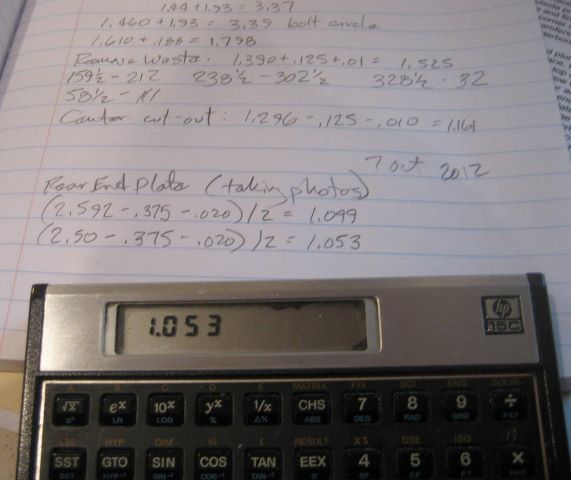
Step 6: A notebook. Short term memory deteriorates as we age. I write all calculated arbor positions in a notebook. This reduces mistakes.
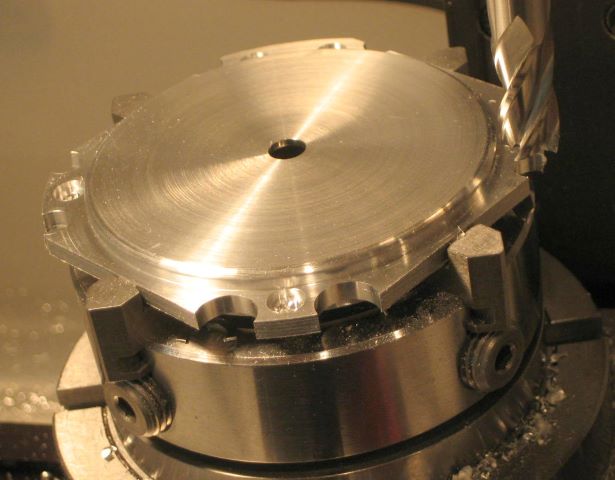
Step 6: Rough mill the recesses.

Step 7: Drill and ream the center hole. The chuck goes straight from mill to lathe with no re-chucking.
Step 8: Bore inside surfaces to final dimension.
Step 8: Turn inside flat surfaces to final dimension.

Step 9, 10, 11: Turn the part over and re-center. The center hole is the only feature available for alignment. The indicator is running on a brass part that closely fits the hole.
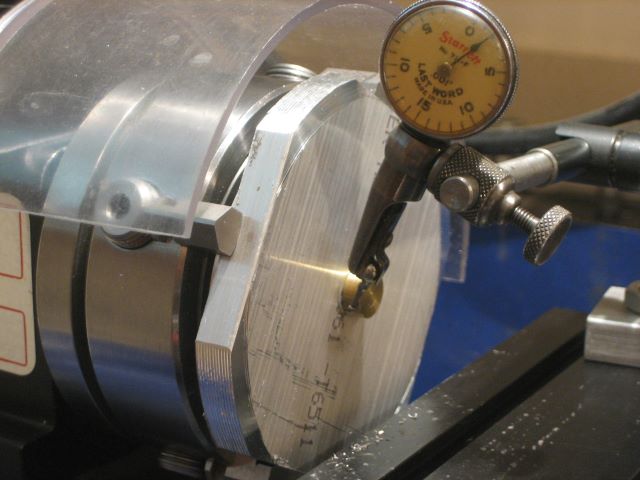
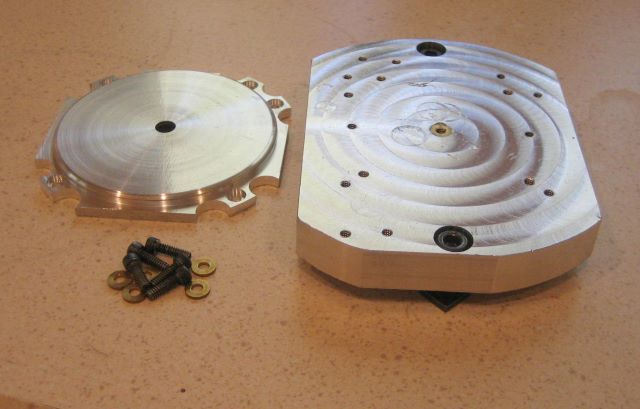
Because the chuck jaw step is higher than the flange thickness of the finished part, I have inserted a .040 thick spacer between the jaws and the part. This spacer is just a round piece of aluminum sheet. Cutting sheet metal is a problem. I cut an oversize circle with a scroll saw, then hold it in a chuck to drill 3 holes, then bolt it to a faceplate to turn the outer diameter.
In re-chucking, you must not only re-center but also get the part down flat on the chuck jaws. Here you see a skin cut at the four corners. I can measure thickness at all corners to see if it is flat (i.e., parallel to the other side).
Step 12: Rough mill the outside profile.

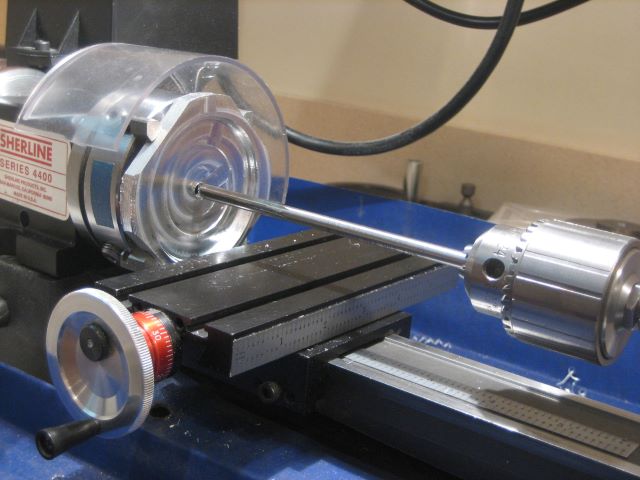
Step 14: Rounding the corner. Here I have turned outside surfaces to final dimension and am making a round corner. The procedure is to cut some chamfers and then smooth with a file.
On Sherline’s lathe you can cut a taper/chamfer by rotating the headstock.
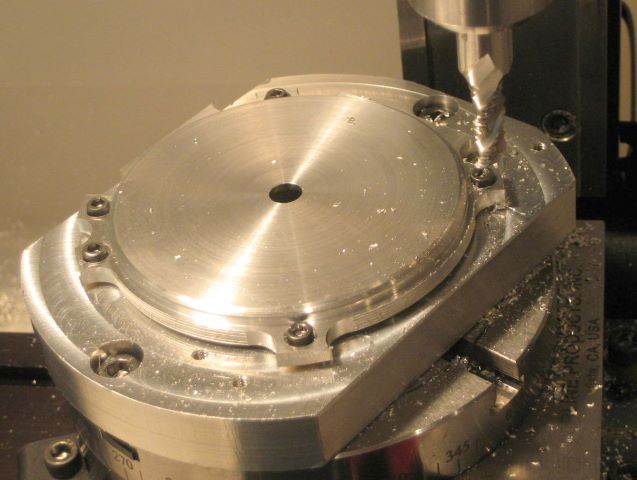
Step 15: Re-check the center of the rotary table before drilling the bolt circle.
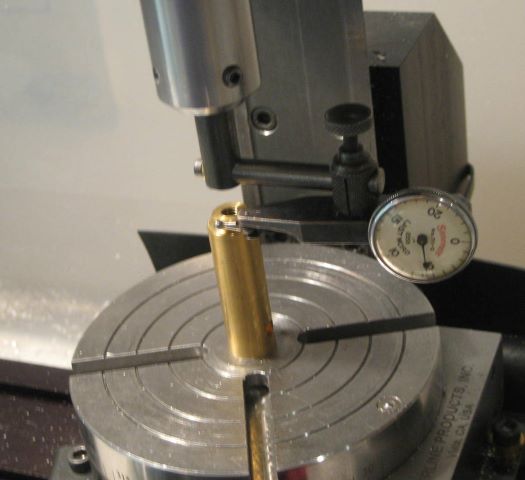
Step 15: Drill and counterbore the bolt circle. Angular position here is very critical. Remember that the rotary table has backlash, and take it out just as you would for the X and Y axes. The rotary table also has a locking setscrew; I had my table for some time before I found it.
Step 16: Plunge mill the inner radii on each side of the lugs. Again, Angular posiiton is critical. I plunge a 1/4 inch roughing end mill before finishing with this 3/8 standard end mill.
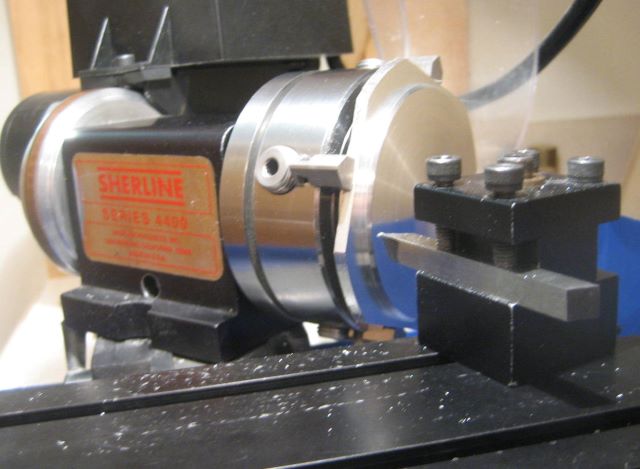
Step 18: Fasten to toolplate. We cannot finish while in the chuck; jaws stand in the way. This toolplate has a pin on the back that pilots into the rotary table.
Step 19: Cut the main outer radius. I start with a roughing end mill and finish the last .010 inch with a standard end mill.
Steps 20, 21: Round the lug corners. Some minor adjustments of radius are needed to make this .175 convex arc meet the .188 concave arcs on a common tangent. I find it easiest to make these adjustments with a 2 flute end mill.

Step 23: Wet sand part face. It could be held in a 4 jaw chuck for this, but here I am using the faceplate that was needed to turn the front end ring inner diameter.

Step 24: Drill, counterbore, plunge mill.

