Mill Alignment

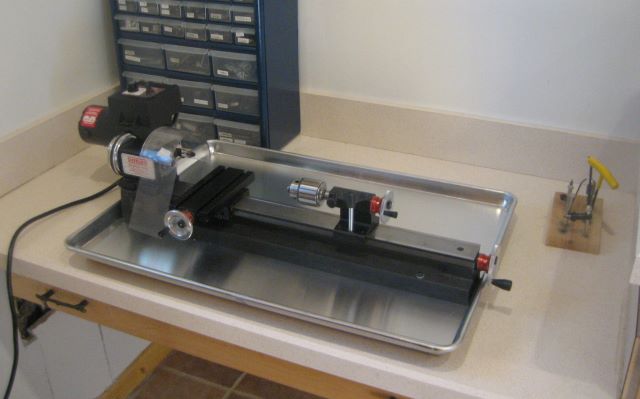
A feature of my new “HiTorque Mini Mill” is that the column (supporting the head) CANNOT be tilted to allow drilling at an angle. This lack of tilt is a positive feature because it means that there should be no way for the head to get out of alignment (i.e., tilted).

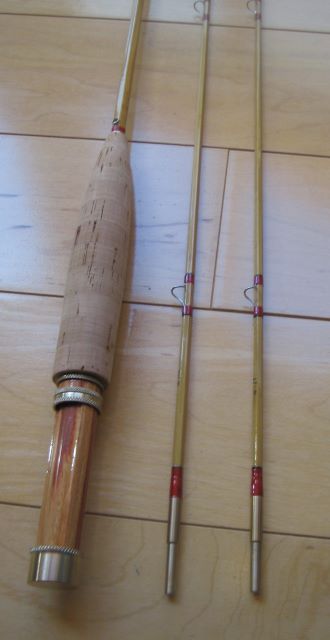
I have lived for several years with an out-of alignment mill, my Sherline. I could bring it into alignment (in the X-Z plane) by loosening 4 screws and re-tightening them while pushing the column to one side. But the limited frictional grip of four 10-32 screws and the overhung weight of the mill’s motor meant that in a short time, vibration would work it back out of alignment. So milling cutters in X direction motion were working on one edge and there would be relatively deep milling marks to be sanded out. The flat surfaces of a reel foot needed a lot of manual work.

The new mill, as delivered, cannot be expected to be in perfect alignment. But the mill column is bolted down to 4 machined pads on the mill base.

So when appropriate shims are placed on each pad, the column’s inherent tilt can be corrected in both the X-Z plane and in the Y-Z plane. And it should stay corrected.

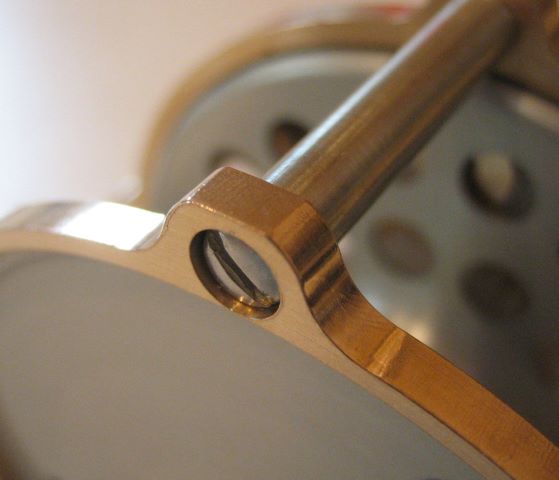
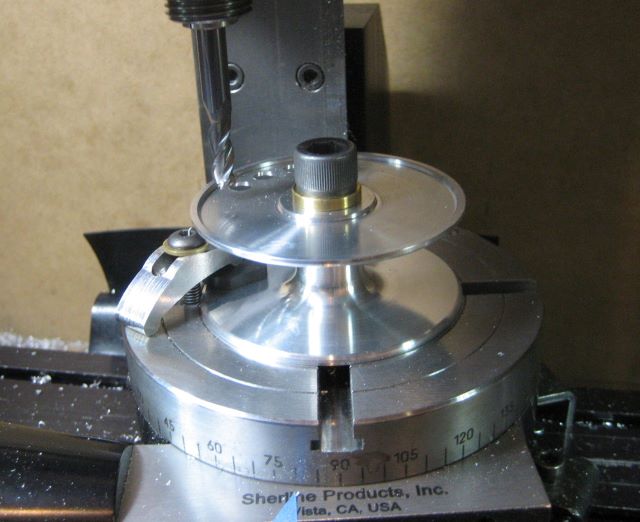
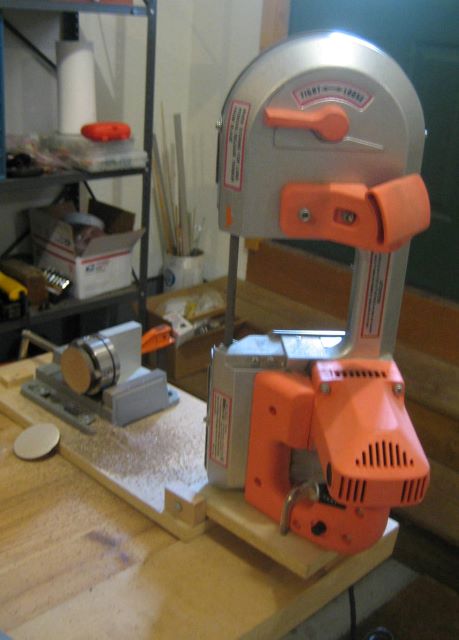
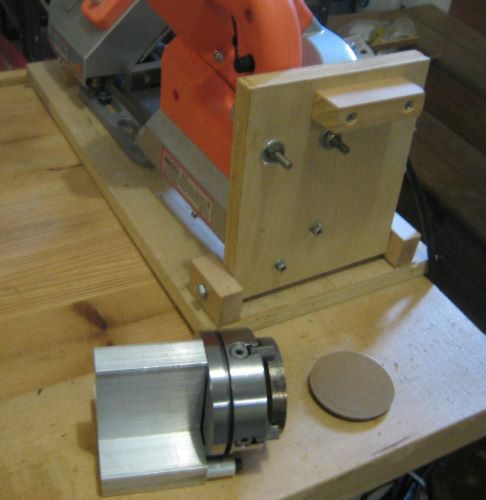
I made a fixture to support a dial test indicator from the mill spindle. This is the first thing that I have made with the new mill. 130 pounds of cast iron runs very smoothly.

With this fixture, I found that the table was out of level in the X direction by .012 inch over a 14.5 inch span, and out of level in the Y direction by .005 inch over a 4 inch span.

By simple proportions of the measurement spans to the mill column bolt stances, I calculated the I needed (ideally) .0044 inch shim for the X direction (side to side) and .0025 inch shim for the Y direction (front to back).

I had on hand brass shim stock of .001 and .005 thickness. So I made 6 shims, 2 at .005 and 4 at .001 thickness. Perhaps .005 and .002 will be “close enough” to .0044 and .0025 .

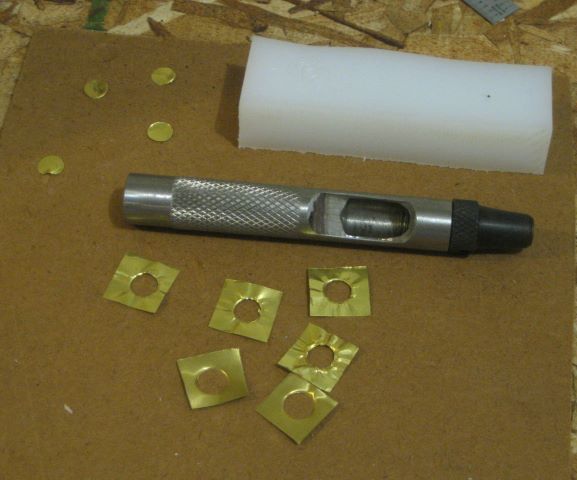
I punched the holes using a scrap of plastic as an anvil, and this wrinkled the shims. No problem; they will flatten out again under pressure from the bolts. The 4 corners of the mill column got .005, .007, .002, and .000 total shim. I could work the shims into place by loosening all 4 columns bolts, removing one bolt at a time, and tilting the column as required to create gaps for shim insertion. A wooden pencil served as a drift to pull the shims into position.

When I re-tightened the bolts, I found the table to now be level within .001 at all corners. This result is beyond my expectations.

Posted in Alignment, Milling | Leave a comment

Radius Turning with the Compound Slide

“Any tool can be the right tool.” – Red Green

I put a “waist” on a reel knob by moving the tip of a lathe tool bit through an arc. The radius of this arc is 1.8 inches and makes a concave profile on the knob. So far, I have done this by using my Sherline mill as a lathe: turn the spindle to horizontal and mount a tool post to the rotary table. But this mill may be on its way out; I have bought a larger mill that has its spindle fixed in a vertical position.

Can I make the required cut using my lathe? Some guys would just do this freehand (the material is wood or plastic), but freehand does not work out well for me.

I have had Sherline’s compound slide for some time but have seldom used it. It always seems more expedient to just pivot the lathe headstock when I need to turn a taper.

The compound slide is an unusual design. Because clearance over the cross slide is limited, the compound mounts behind the workpiece and holds a tool bit upside down. The tip of the tool bit can be moved through an arc if the angle setting is not locked down.

Here is a freshly shaped knob. I can’t say that this would work if the material was metal, but for wood it is satisfactory.

Posted in Knob, Turning | Leave a comment

A New Mill

I finally did what many have told me I should do, and that is get a bigger mill for my reel work.

This is a Model 3990 from Little Machine Shop. It is several times heavier, stiffer, and more powerful than the Sherline mill that I have been using. It is too big for the utility room in my house, so I have bolted it to a workbench in the garage. Before next winter, I have to figure out how to heat the space.

For the near future, I intend to continue with the Sherline lathe. For many of the larger parts of a reel, I make an oversize rough part using the mill, then take final light cuts with the lathe. This makes the small size of the lathe less of a problem. And for the many reel parts that are under 3/8 inch diameter, the Sherline lathe is just right.

Update 12 May 2015: I am trying to adjust to the larger scale of this mill. Here is a comparison of the R8 collet that it uses with the MT1 collet of the Sherline mill.

And here is the 3 inch milling vise compared with the Sherline 2 inch vise.

The picture does not tell the whole story; the new new vise is steel and the Sherline is aluminum, so the weight ratio is even larger.

I am going to continue with the Sherline rotary tables. At 4 inch diameter, they are good for reel work. I have already made many fixtures that fit these tables. The rotary tables offered by Little Machine Shop are calibrated in minutes rather than tenths of a degree and I think that this adds potential for error to every calculation of angle.

It looks as if there is enough X direction travel that I will be able to “permanently” bolt down the vise and two rotary tables, saving setup time.

(note 4 Jan 2020 : While all 3 fixtures would fit, I never kept them this way. Too much clutter and interference between fixtures. Better to re-align at each use.)

I am still struggling with the issue of the X and Y leadscrews, they are 16 threads per inch. I cannot very well do modulus 62.5 arithmetic in my head, but modulus 50 (for the Sherline 20/inch screws) is quite manageable. Options are:
1. buy the Little Machine Shop kit to change the screws to 20/inch, or
2. buy digital readouts for the two axes and ignore the engraved scales on the crank skirts.

Update 25 May 2015: I bought the conversion kit for 20/inch leadscrews, and have now installed these. LMS provided very good step-by-step instructions for this conversion, and I recommend that anyone who buys this mill go through this tear down and reassembly, even if not making the conversion. It the only way to get at many hidden areas that should be cleaned of the preservation gel, and to lubricate internal parts.
LMS does not provide a rule for the Y axis motion, but it will be easy to add one. The X axis rule that they did provide has 1/16 inch markings, so I will cover it over with a 1/10 inch rule.

Posted in Milling | 4 Comments

Swarf Pan

I have been collecting waste chips from the lathe in shallow pans made of folded poster board, placed in front and back of the lathe base.  To make a more effective collection, I recently bought an aluminum “full sheet” baking pan.  It measures 25.75 x 18, just big enough for a Sherline 4400 lathe.

Under the pan is a 24 x 12 piece of MDF, into which the four mounting screws anchor.


The Z axis wheel just clears the pan rim.  At the other end, the threading attachment clears the opposite rim.

Posted in Fixtures, Turning | 2 Comments

Wood Stabilization

When a reel is specified to have a wood knob, I typically finish the wood with Tru-Oil. Then one reel came back to me with a tight knob. I know that it originally rotated freely; the wood must have shrunken.

So a more intensive treatment for wood knobs is in order. Here is my kit: wine bottle (empty), Vacu Vin, drilled blanks for knobs, and Minwax wood hardener.
<
Vacu Vin is a wine bottle stopper and vacuum pump. I do not know how much vacuum it creates, but it must be substantial or else it would not be effective in removing oxygen from a partial bottle.

Recipe: Put knob blanks into bottle, cover with Wood Hardener. Pump down the bottle until you hear the stopper click (much foam when air is pulled out of the wood). Let sit for 1/2 hour. Pour off the excess hardener, extract the blanks and let dry.

I envision that hardener is forced into the wood pores when the vacuum is released.

Update 2 June 2015: Having dealt with several knobs processed this way, I now feel that the stabilization is not adequate. So I am agreed with Terry, it is best to use plastic.

Posted in Knob | Tagged | 4 Comments

Rounding the Corners

The is the rear end plate of reel S/N 52, screwed to a tool plate while I round off the corners of the pillar lugs.

This is a fussy operation, with fine positioning of the Y and rotary axes to make all the arcs meet on tangents. A step between arcs of .001 inch would be highly visible.

Prior to this operation, I cut the 4 large arcs between the pillars, plus the notch between the two lugs at the reel foot. The milling cutter diameter sets the radius of the concave arcs on either side of the lug. At this point I could, in theory, cut a single arc spanning about 180 degrees around each lug. But to do this, I have to remove the end plate from its centered positon on the tool plate and reattach it so that one lug is at the center of the tool plate. This amount to “re-chucking” the part, and always involves a positioning error. So a single convex arc around the top of the lug does not match up with both concave arcs.

My solution is this: I cut a small flat across the top of the lug, then two corner rounding cuts. Each of these corner rounding cuts has to match up with only one concave arc, a much easier positioning problem. The corner rounding arc and the flat across the top of the lug do not meet on a tangent, but rather form a “sharp” corner that is still acceptable in finished appearance. Here is the end result:

It is problems like this that make me think about acquiring a CNC mill. The G code that runs such machines has convenient commands for making arcs around specified centers, without having to re-chuck the part.

Posted in End Plate, Milling | 2 Comments

Spool Porting

The “ports” are holes in the flanges of a spool, made to reduce weight and to provide ventilation for a wet fly line.

Today I am using my rotary indexer to port a group of 5 spools. I am building them as a batch so I can do a lot of anodizing in one day. In my new bronze frame reel design, the spool and knob hardware are the only aluminum parts.


The back flange pattern is very simple, just a ring of 18 holes and a ring of 12 holes. With the indexer, I am able to make all 30 holes in 12 minutes.


The front flange requires a little more attention. Several ports are omitted, to serve as a counterweight to the knob. And then there are some tool changes to drill and tap the hole where the knob mounts.

Posted in Spool | 4 Comments

Ready for 2015 Trico Season

July is a long way off, but I am ready. Last summer, local rodmaker Bob made a 6’7″ 3wt rod that I really liked. So he and I did some bartering and I wound up with this near copy of his rod.


I made the reel seat hardware and the ferrules from Duronze (c642 aluminum bronze).
Bob’s wife Linda made a rod bag for it, then friend Steve donated a vintage rod tube.

Not bad for a zero cash transaction.
Just today I finished a bronze reel for the new rod. The wooden insert of the rod and the reel knob are both Brazilian tulip.

Earlier this week I shipped the first bronze reel of 5 weight size. It has two spools.

Posted in Rods | 1 Comment

Handling Large Bar Stock

My current reel design has a brass or bronze frame. The “5 weight reel” is a little less than 3 inches over the pillar lugs, and the “3 weight” is a little less than 2.5 inches. I made the first two 5 weight reels from c360 brass, for which I could buy 1/8 and 1/4 thick rectangular bar stock (3″ wide) from Online Metals. It was easy to cut off the required square with a power hacksaw.
I have made 3 reels of the 3 weight size by now, and for those I used c544 bronze. This is available only as round rod, and the largest rod offered by Online Metals is 2.5 diameter. Here is the setup in my garage for cutting disks from the 2.5 inch rod.

Online Metals will cut special lengths, so I buy 1.4 inch lengths, which is enough to make 3 reels (3 front rings and 3 rear end plates), if the hacksaw cuts are carefully made.

Here is a better view of the holder for the Sherline 4 jaw chuck. This holder fits in the drill press vise that is part of my hacksaw frame

I wanted to start making 5 weight reels from bronze also, and had to order 3 inch rod from a distributor who is not as well onboard with Internet shopping. I bought a 13 inch long rod; it weighs 29 pounds.

To hold the rod in the vise, I made two rectangular collars from UHMW.

And here is the product, disks ready for machining on my small lathe and mill.

A 3 inch disk is a little too large to turn using the standard Sherline chucks; the backs of the jaws will hit the lathe bed. I milled 4 flats on the disks so that I could turn without using riser blocks.

Update 9 July 2015: Using my small bandsaw, I cut 14 disks to make 7 reels. But I also cut a couple of unuseable disks. The wooden guide frame is not rigid enough to keep the blade from wandering if I apply too much hand pressure while making the cut. Also, I found that I was spending a lot of time in squaring up the sawn disks.

So I took the rest of the bronze rod to a machine shop in a nearby town and had it parted into clean disks.

This is my box of 24 disks to make 12 more reels.

Parting the 3 inch rod takes a cut-off tool of .120 inch width, so a lot of material is lost in this process. But it is not a lot more than the amount of material that I had to allow for clean-up when using the bandsaw.

Little Machine Shop makes a bandsaw that I probably would have bought had it been available at the time I made my wood frame tool. It has a metal frame that is more rigid, and it is pivoted from the light end of the portable saw, allowing gravity to provide more of the cutting force. This might be the ticket. Of course, there are also full size horizontal bandsaws available from many sources.

Posted in Work Holding | 2 Comments

Greg’s Reels

Greg is a bamboo rod maker and Grayrock attendee. He has the plans for my first reel design, and has recently completed two examples. He even set up an anodizing cell and then dyed one of the part sets.

I believe that he works with a Sherline mill and lathe. The lathe at least is popular with rod makers.
The plans have been on sale for some time at Reel Lines Press, but this is the first report that I have had of reels completed.

Posted in Reels by Readers | Leave a comment