
Leo is good at English composition (as well as many other things) so I will just post his Email as sent.
“Hi Dave
My name is Leo, I’m from Germany, been fly fishing for the second year now. Last fall, I built my first rod, and since I am a hobby machinist for the past fifteen years, I just couldn’t live with a store-bought reel on a homemade rod. So I built a reel, and that’s when the mania started. Your website/blog has been a great help in the process, that’s why I wanted to thank you for all the effort you put into documenting your machining, anodizing and designing and improving of your reels.
So far I have made six reels, the first three have a click drag similar to the design of Ralf Vosseler’s reels. The drag on reel number three is adjustable. Number four and five, the black S-Handle reels, have a click drag which I copied from a Scandinavian guy whose name I forgot. Number six has a click drag of your design and I am happy to tell you that it has the smoothest action and nicest sound of all my reels, so I will continue to work with this style of click drag. Reel number six was also the first one that I anodized and colored. Again, thank you so much for the great content on your blog regarding this subject.
So far I am making those reels just for myself, each accompanied by a suitable rod.
In this e-mail I will include a few photos of my reels. And if you search on YouTube for my channel (“Fusselkopp”), you can watch three videos of the making of reel number three.
With best regards from Germany, keep up the great work!
Leo”


After seeing this, I pushed him to send some more details:
“Well, so here it is.
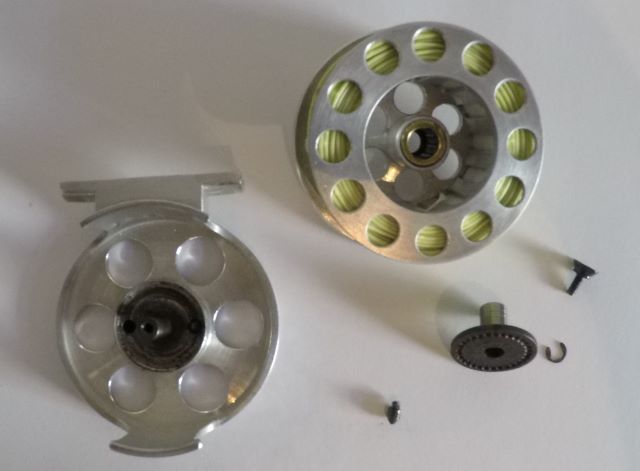
Reel No.1 to No.3 have the same mechanism, two hollow pins with springs from a disposable cigarette lighter inside them. The pointed ends of the pins engage on a wheel with detents on the back side. This wheel is press-fit onto a hollow shaft, which rides on the center shaft of the reel. The spools themselves have one-way-bearings pressed into the center which ride on the hollow shaft. This lets the spool engage the drag shaft/wheel when line is pulled from the reel, whilst it runs freely as you wind the line back in.
Reel No.3 has an adjustable drag. To achieve this, the described hollow pins and their springs are housed inside a cup, which the drag-adjust-knob presses against, as you tighten or loosen it. This system works well, but it is fiddly to install, the non-hardened pins and wheel are a little prone to wear and the one-way bearing, hollow shaft and wheel amount to some weight. Also the pins demand quite a lot of space in the axial direction, making it slightly difficult to design a slim frame.
Reel No.4 was inspired by your work, but built mostly from stock that was on hand at the moment, so the dimensions came together on the go.
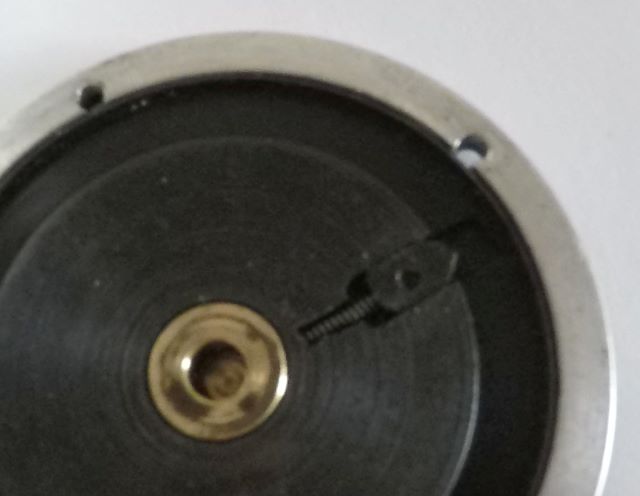
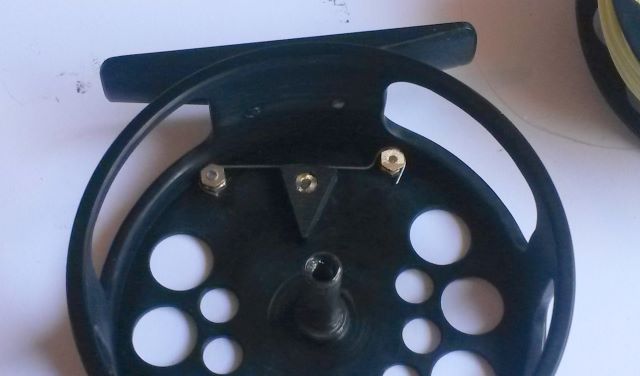
The right side spool end (Delrin) plate has a lip around the outside with teeth are milled into. These teeth are engaged by a pawl (Delrin), which rides in a slot in the right-side end plate of the reel. The pawl is, again, actuated by a spring from a cigarette lighter. this system works really well, but also demands some space. The drag resistance is the same in both wind & unwind direction.
Reel No.5 is just the upscaled version of No.4, with the exception of the slot for the pawl being milled off-center, so the drag resistance in the unwind direction is much greater than when winding in.
Reel No.6 is pretty much modeled after your designs, so I don´t need to go into detail on the click mechanism. I´ll just say it works (and sounds) great, takes up little space and the resistance when pulling out line is noticeably stronger than when winding in.
This reel was also my first attempt at anodizing and coloring, and I am really happy with the results.
Reel No.1:
70mm OD, 33mm overall width, WF4F plus some backing, weight is around 140g
The design was a bit of an experiment, looked better in my head than in real life, but works.
Reel No.2:
65mm OD, 28mm overall width, WF4F plus a minute amount of backing, around 95g
Reel No.3:
78mm OD, 49mm overall width(drag knob sticks out quite a bit), WF7SI and some backing, around 180g


Reel No.4.
77mm OD, 40mm overall width, WF4f and an insane amount of Backing, don´t remember the weight.

Reel No.5:
95mm OD, 45mm overall width, WF8F spey line(double-handed rod) plus some backing, never weighed. Feels heavy, but still a bit too light to balance a 12´6″ rod.
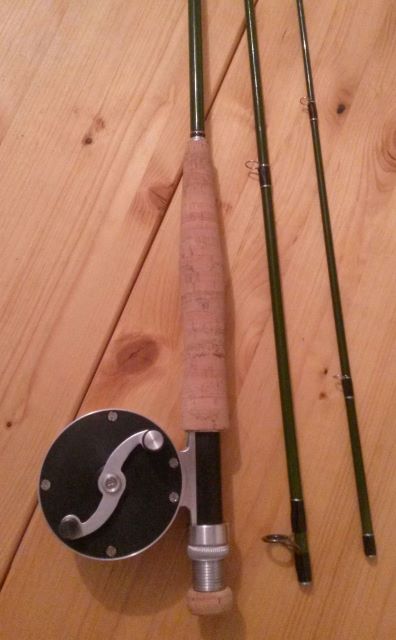
Reel No.6:
75mm OD, 30mm width, WF3F plus a good amount of backing, also around 95g”

Here is a link to Leo’s first video on making reel 3: Part 1 I found it quite entertaining. Links to the other two parts will appear when you watch this.

David, it must be exciting to have such an inspired follower. His ingenuity is unbound.
Fred,
Yes. I hope that you watched his videos. Good humor.
Dave
This is awesome! I know I probably haven’t looked around well enough but would happen to have a full set of drawings for a spey size reel? I would be very interested in machining one at my high school as I have access to both a lathe and mill. Thanks!
Erick,
I did not see any indication of a plan set. His videos indicate that he is one of these guys that can work from just rough hand sketches.
Dave
First of all, thank you for the kind words!
Dave, you guessed it right, I usually work straight from my mind with the odd napkin drawing in case it gets conplicated, for example hole patterns.
But Erick, I would offer you to drop you an email in the next few weeks(going on vacation tomorrow) and I ‘d provide you with some handmade drawings that you can either convert to a full set of working drawings(because I’m too impatient to learn CAD) or maybe these drawings might even be enough for you to work from.
Leo
I would love some drawings to started off of. My email is ericksfishing@gmail.com. Thanks again!