
To go with the one piece spool, I have also made a one piece frame. This is a record of the steps.
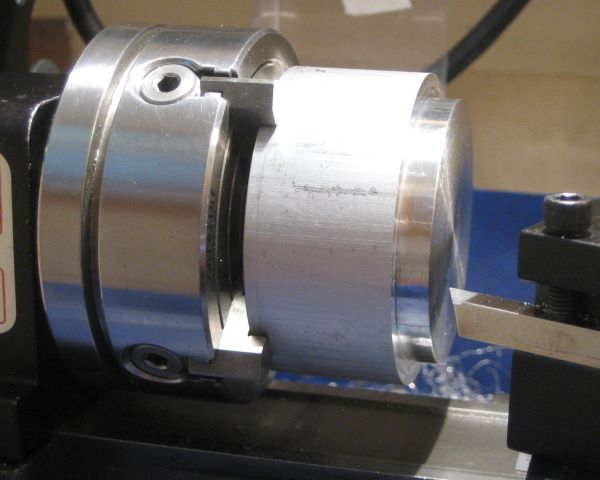
Face the material on both ends and cut a “grip”, a projection for holding the work in many coming steps.
Groove the finished OD to enhance the milgrain pattern.
(Update 14 Nov 2013: In the above picture, I am making two closely spaced grooves with a sharp tool and will then press the milgrain tool into the narrow land in between. It turns out that the resulting pattern is partially erased when the part is later tumbled in abrasive media. I have found that the milgrain pattern is better preserved if it is made at the bottom of a groove. My milgrain wheel is .048 inch wide, and a groove .052 wide and .010 deep works well.)

Apply the milgrain.
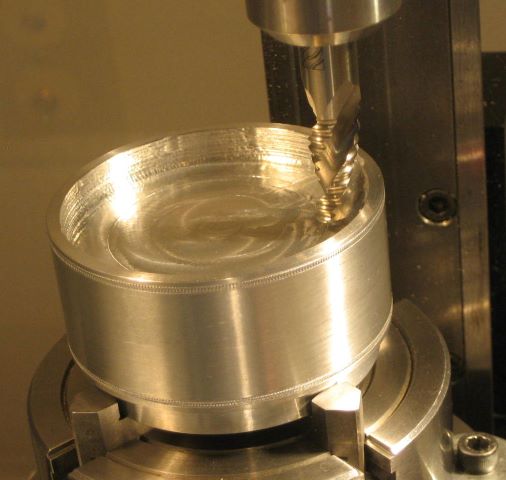
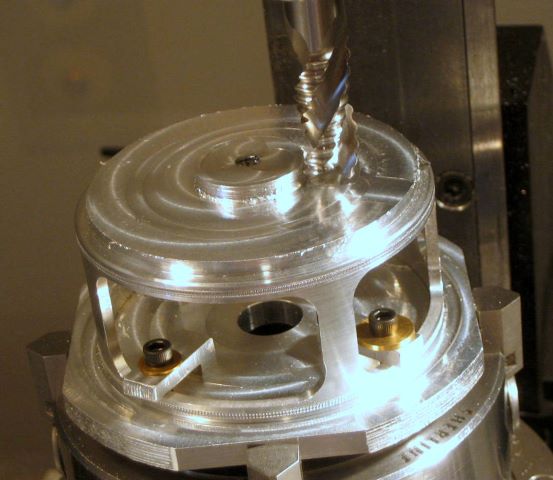
Hollow out the inside with a roughing end mill.
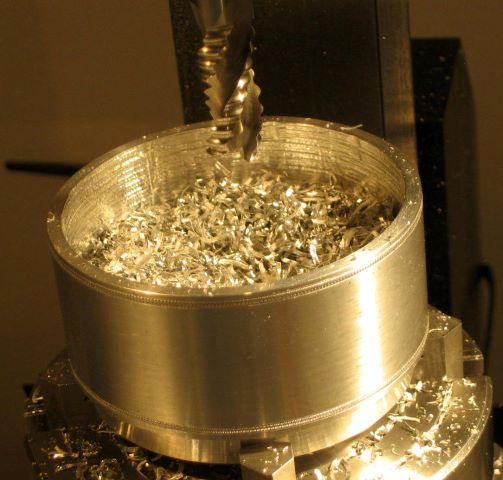
Working in the vertical position causes chips to accumulate. I may try to do this in a horizontal position the next time.
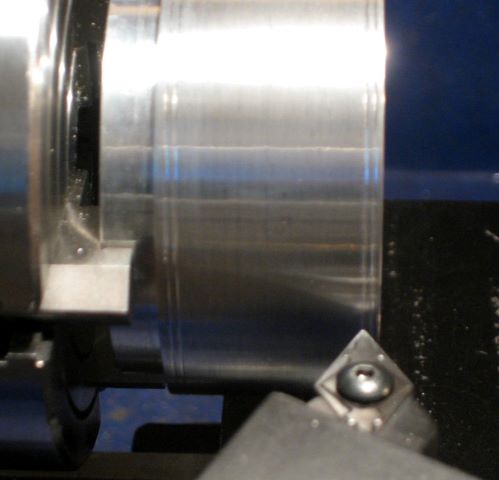
Turn the ID with a boring tool. This tool is too long and skinny to make a good finish.
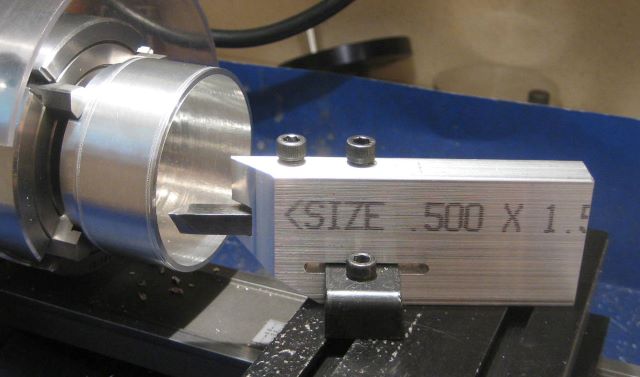
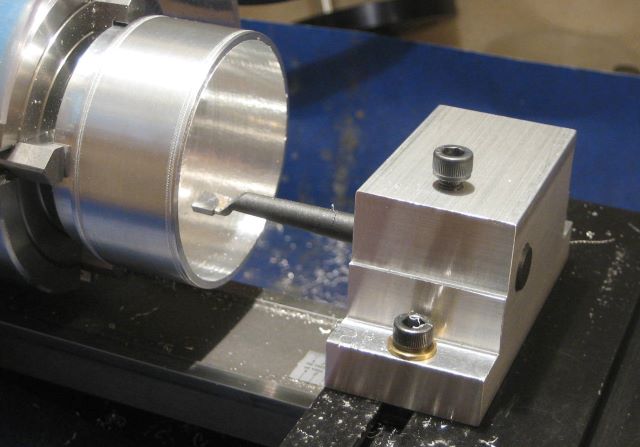
Turn a finished surface on the bottom. I made a special tool post to get the bit deep enough.
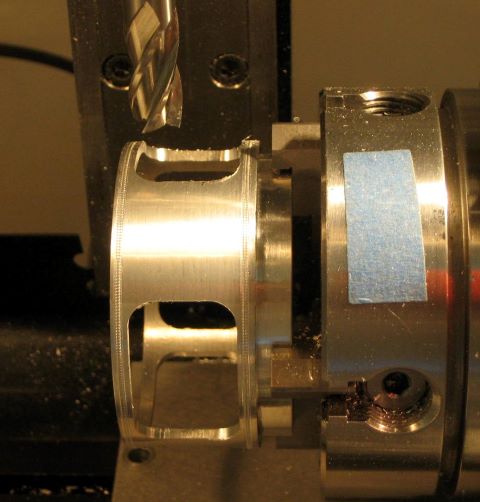
Mill out the “windows”. This creates sharp edges that I do not know to remove, except by tumbling in abrasive media. My skill with a file is not adequate to do the job.

Drill and countersink holes for foot mounting.
Finally the part can be unchucked from the “grip”. Here I have fit it to a grooved tool plate in order to work on the back.

Trimming back with a roughing end mill.
Continuing with a ball end mill. This is followed by turning.
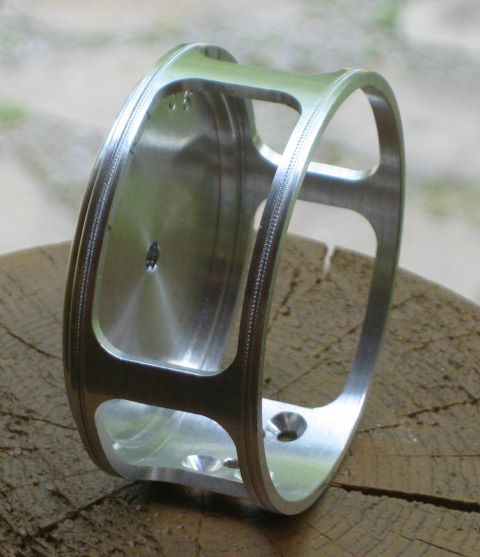
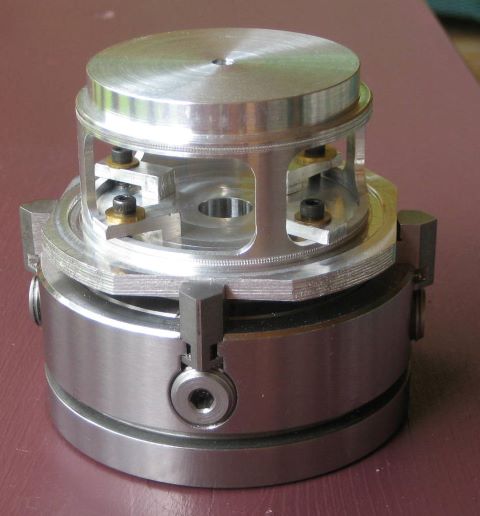
This is the finished part, not yet ported, tumbled, or anodized.
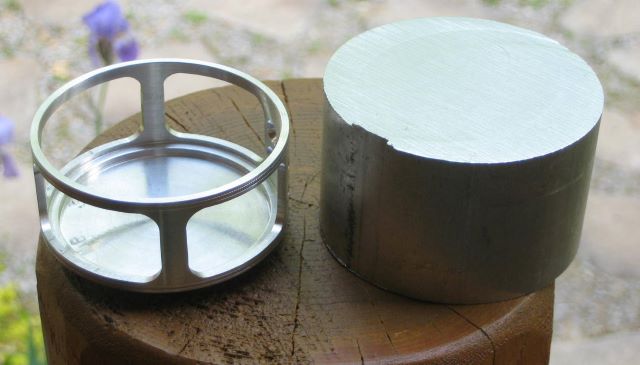
The material weighed 11.7 ounces, and the finshed part is 0.77 ounce. So 93 % of the material was turned into chips

Great work considering the size of machines you’re using. For the windows sharp edges go in with a three square scraper. Something like this http://www.grobetusa.com/burnishers_scrapers/scrapers/three_square_machinists_scrapers.html But you can make one with the tip of a triangular (three square) needle file.
Simon,
Thank you for pointing out hand scrapers. This is a tool of which I have little knowledge, but I found the Wikipedia article “Hand Scraper” and its three references quite informative.
Dave
No worries, I’ve enjoyed reading your blog so there’s nothing to giving back a little. The wiki article talks mostly of flat scraping but a little three square is mostly for d’burring. I rarely use a file for d’burring, it’s that versatile. Especially in aluminium. Get yourself a triangular file and stone the teeth off the first 1/2 to 3/4 inch making sur the corners are sharp and the faces flat. It takes a little getting used to but once you’ve tried it there’s no going back. Here’s a little tip: make sure one of the flat faces is flat on the piece you’re working on canting it forwards makes it dig in, canting it backwards just rubs doesn’t cut. Let me know if it works out for you. If not I’ll make you a small video.
Simon,
I was able to borrow a triangular scraper from a local friend. It has a blade 3 inches long and 5/16 on a side. It takes off a burr very nicely, and I see what you mean about the angle.. So I must buy one.
On the reels, I would like to be able to put a .030 inch radius on all the corners surrounding each “window”. That is too much to expect from the scraper, or from my tumbler. So I will live with the square corner, and perhaps add a line guard.
Dave
30thou that’s a horse of a different colour I agree. It might be too late, unless you’re willing to put the frame back on the indexer and dial it up. Best I can suggest is to mill a small chamfer say 25thou with a 45deg. dovetail cutter for the inside edge and a pointy 45deg D-bit for the outside edge. Then round off the corners of that chamfer with the scraper. The trick is to use cutters that will give you the same radius as your end mill at the chamfer line. I’m sure cutters could be ground with the 30thou radius in them but that’s an expensive proposition.
By the way I’m this guy! http://www.reelsmithing.com/forum/viewtopic.php?f=10&t=564&sid=acc2093d07ebc525f5d120e0b0c10638
Lastly something to toss around. I’ve been thinking about two piece spools. They would make machining them considerably easier than the one piece style while being considerably stronger than the three piece style you’ve been using. In the simplest terms two discs each with a raised boss in the middle, one boss is o.d threaded with a guiding strait portion and the other is i.d. threaded and counter bored such that the guiding portion on the male boss centers both halves. Once assembled everything should run true. Of course assembly can only be done after anodizing so as not to trap acid inside the piece.
Simon,
For all the reasons you mention, I do not intend to chamfer the edges of the windows. There is really no need to emulate a die cast product. But I do think that a line guard is in order.
Thanks for pointing out your post on Reelsmithing. This gives me reference.
If you try the two piece spool, let me recommend Loctite 609 retainer. It would let you skip the threads. See my post :”Loctite Assembly of Spool” for details of strength test.
When doing 3 piece spools, I have to be careful with alignment when bonding because the L/D of the joint is small. But you could increase the overlap (L) with two pieces. Still, it sounds like a lot of chips. When bonding anodized aluminum you need to use an activator like 7649.
Dave