
I posted the article “Lathe Bit Grinding” on 1 July 2013. Since then I have arrived at a better scheme, as described here. Bit grinding is somewhat an art and you will find many alternative styles of lathe bit. My goal has been to find a method that is quick and repeatable, producing a bit that is easily re-sharpened. All grinds are made with the tool held firmly against a spacer plate on top of the tool rest.
Here is a borrowed illustration which establishes nomenclature for lathe bits ground from high speed steel:

Image taken from the web site Instructables.com
My first metal lathe was a Sherline. You can buy pre-ground bits from Sherline, one is shown here. Initially I tried to reproduce this grind myself.
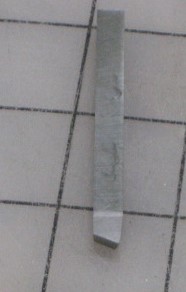
These bits have zero Back Rake (see nomenclature illustration) and the entire cutting edge (intersection of side and top surfaces) is very near the height of the bit blank. When the bit is sharpened by additional grinding of the side, the height of the cutting edge is reduced (as the edge moves down the Side Rake) and shimming of the bit (for use in a simple tool post) will be needed. But what is difficult about sharpening this bit is that the ground surface on the side is flat, whereas a grinding wheel has a radius. It would be difficult the hand hold the bit and make new side surface that is flat. Sherline undoubtedly has good tooling for producing this grind.
The grind pattern that I am using includes some Back Rake, and reduces the cutting edge height by .020 inch or so right from the start. So I am always shimming underneath my lathe bits.

It is easy to measure the edge height with a micrometer and determine the amount of shim required. My frequently used Sherline tool post needs the edge to be at 0.250 inch (i.e., the full height of the blank). The larger tool post for my Minilathe requires 0.332 inch. I think that it was designed for 8 mm tool blanks (0.315 inch) so at least 0.017 inch shim is always needed.
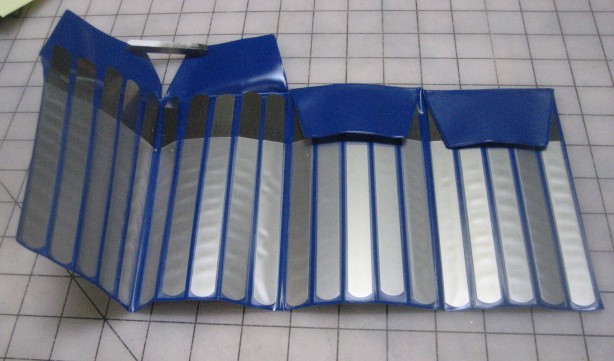
I made a selection of shims from brass shim stock and scrap material.

You could make a very complete set of shims from a feeler gauge kit.
These are Sherline tool posts for 1/4 inch bits, for 3/8 inch bits, and a “rocker” tool post.
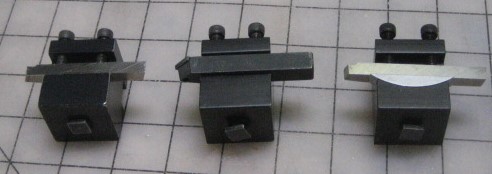
The rocker is supposed to eliminate the need for shims but I find it to be fussy to set tool height and so seldom use it. Much quicker to measure the edge height and then select a few shims.
This is the Minilathe standard tool post. I use 1/4 inch bits in it, which need at least 0.082 inch shim. The greatest part of this shim pack is in a brass part with a step that provides an alignment edge. The step width is set to locate the bit under the clamp screws.

My grinder is a Delta that you would find in many hardware/home supply stores. The tool rest angle can be set in increments by the radial serrations you see on the mounting lug. The increments are too coarse for the purpose of bit grinding.

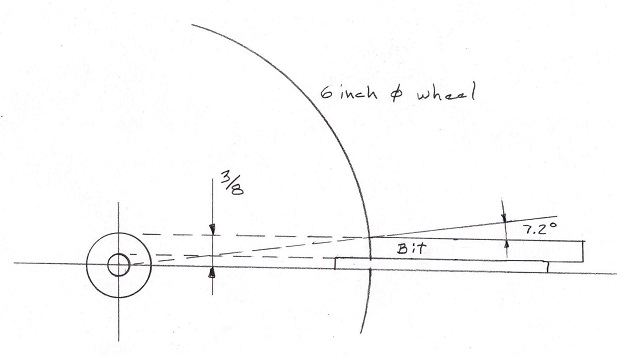
One of the increments sets the surface of the rest in line with the center of the 6 inch diameter wheel.
Here is a sketch of the grinding geometry. I have made a 1/8 inch thick plate to set on top of the tool rest. If I hold the bit flat against this plate, the relief angle of the grind is asin(0.125 / 3.0) = 2.4 degrees at the bottom of the bit. (3.0 is the wheel radius.) But at the top of the bit, 1/4 inch higher, the relief angle is asin(0.375 / 3.0) = 7.2 degrees. This is the effective relief angle at the cutting edge.
So here is a view of my cover plate for the tool rest.

It has some lines engraved as guides for grinding.
Following are the steps in grinding. I show a tool bit that is already ground, rather than a new blank.
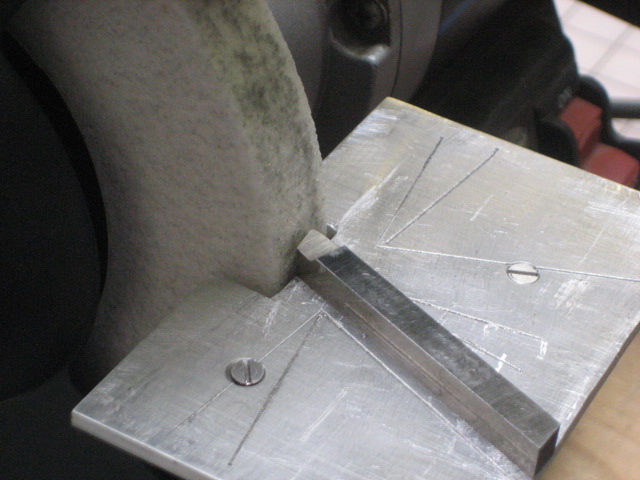
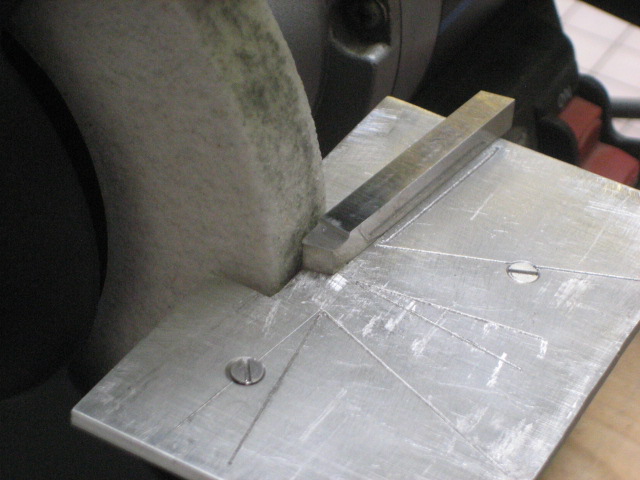
The first grind is on the end. I hold the bit flat against the cover plate. The End Cutting Edge Angle is 25 degrees. The End Relief Angle is 7.2 degrees at the top of the bit.
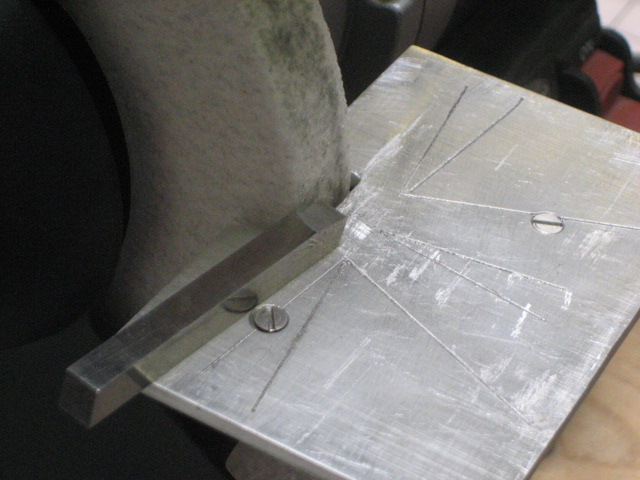
The second grind is on the side of the bit; again I hold the bit flat against the cover plate. The Side Cutting Edge Angle is 10 degrees and the Side Relief Angle is 7.2 degrees at the top of the bit.
When re-sharping a bit, this is often the only grind that needs a re-touch.
Finally, grind the top of the bit, again holding the bit flat on the cover plate. The Back Rake Angle is 10 degrees and the Side Rake Angle is about 7.2 degrees at the cutting edge.
This grind can be eliminated for a tool meant to cut only brass.
End Relief, Side Relief, and Side Rake are all curved surfaces (3 inch radius). This makes no difference in how the tool preforms.
My grind pattern has a 75 degree included angle at the tip, and that seems to be good for getting into a square step. But the tool post has to be turned at a small angle, as shown here.

Quick Change Tool Posts have height adjusters that eliminate the need for shims under the bit. But, if I understand them correctly, they have to be mounted square to the cross slide and so some special bit shape would be needed for corners, perhaps a negative Side Cutting Angle. The freedom to rotate the tool post seems to me to be so important that I have never invested in a QCTP.
Update 20 Aug 2020: I just found this article, Hoffman Article. It says that I am wrong on tool height above the grinding rest, that instead of aiming for 7 degrees at the top of the bit you should have 7 degrees at the mid point. This is because a properly stoned tool will have a little material removed at the top and bottom of each face, and the true relief angle will be midway between the top and bottom angles that the grinder produces. He has some good photos that show this. So maybe my tool rest cover plate should be 1/8 inch thicker.

I have the same lathe as you and can report that I have upgraded it to a QCTP without any loss in the ability to quickly and easily change the toolpost angle. In fact, I have made it an even smoother process by replacing the washer between the square body and the lever with a thrust bearing. I have over a dozen tools mounted in quick change holders and can’t imagine not having or using a QCTP at this point.
Thank you for the report Bert, this is good to know. Now the only thing holding me back on the QCTP is that there are 12 HSS and 6 carbide bits that I use with some regularity; too many bit holders to buy.