
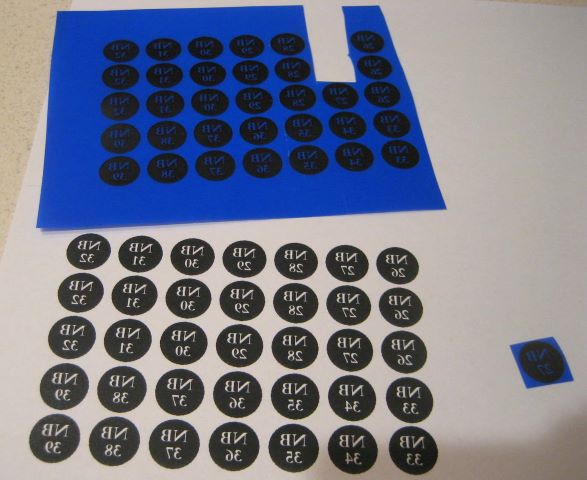
I like to put some identifying marks on my reels, typically the letters “NB” (for North Branch) and a two digit sequence number. In the past, I have taken a group of rear bearing caps to a jeweler’s shop and had them engraved. The local jewelers have machines that push a stylus across the surface of the metal, making a rather light scratch. A rotary engraver would make a better impression. I made a bracket to hold my Dremel tool on my mill (this blog, 14 Aug 2011). This lets me carve straight lines and circular arcs, but is not sufficient to do lettering. Making a pantograph that is large enough to hold the Dremel is too big a project for the value realized. One can buy rotary engravers, but they are expensive.
So I have been thinking about etching to create the letters and numbers. On my new reel model, these go onto the head of a large screw that secures the spindle to the reel backplate. The area to be engraved is a circle of about one half inch diameter, so the four characters need to be about 1/8 inch tall. As best I can determine, the preferred etchant is Edinburgh Etch, a mixture of ferric chloride and citric acid. To make a mask, I bought some fine point “opaque paint markers” meant for calligraphy, but could not form characters small enough. So my experiments here are with Press-n-Peel, a medium used for DIY circuit boards. Below is my artwork, and the copy made on Press-n-Peel.
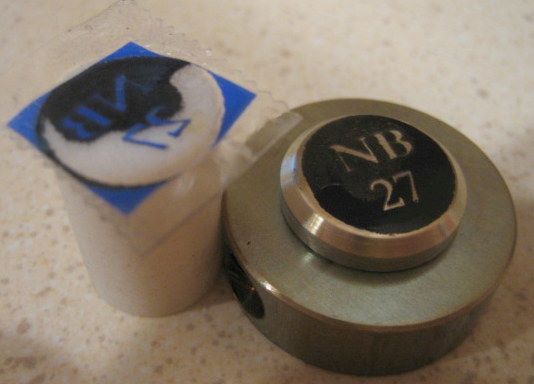
For a heat source, I borrowed a craft iron and made a bronze disk to hold the screw while it warmed up. The disk has a hole on its outer diameter where I can insert an oven temperature probe.

The iron had enough power to get the screw above 300 deg F. But I had trouble getting complete transfer of the mask. Here you can see a poorly transferred mask and the piece of Teflon that I used to apply pressure on the hot screw head.
It was difficult to hold the Press-n-Peel in the exact position while pressing. If I make additional trials with this method, I will make some type of mechanical clamp that I can assemble cold, then put the whole thing into an oven.
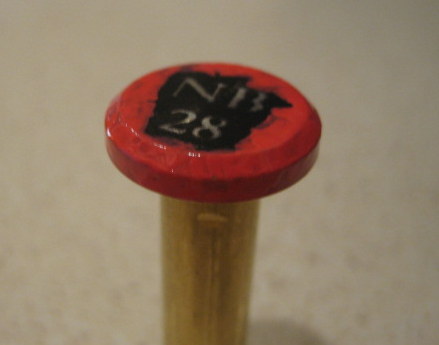
After getting a somewhat satisfactory transfer, I covered the edges of the screw head with paint.
Here is the etching process, using electrical tape to make a dam to contain the etchant.
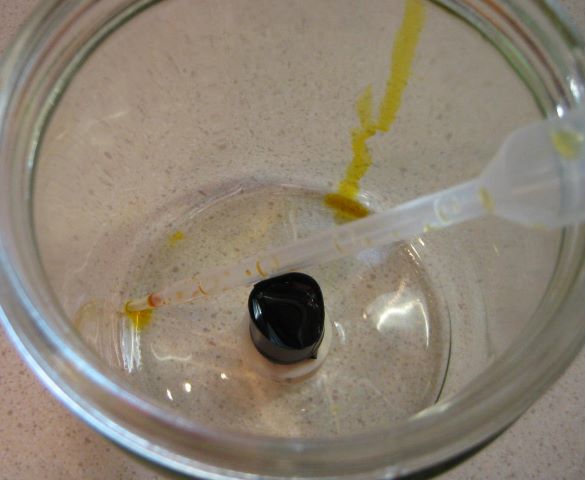
The instructions that I had said to etch for 20 to 60 minutes, depending on the newness of the acid. I etched for 30 minutes.
But the result was an insufficient impression, plus gouges where I did not adequately cover with paint.
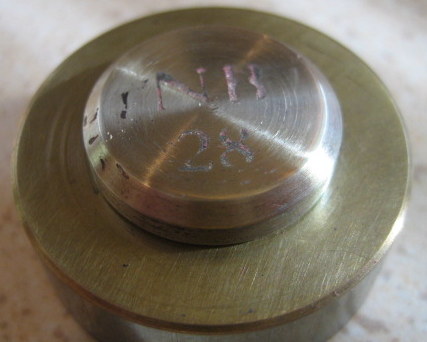
It looks as if the etchant is strong enough; the “gouges” at the paint gaps show good etching. I think that the problem is the Press-n-Peel mask. It looks as if the characters are unmasked, but something has partly blocked the etching there.
The effort so far is unsuccessful. I post this as information for anyone who may work on a similar approach.
Update 6 Nov 2012:
In the replies to this post, Rich has suggested hand engraving. This has caused me to buy a book, The Jewelry Engravers Manual. I recommend this book to anyone who has interest in this dying craft. It explains gravers and sharpening, and how to cut several type of letters. Last week a jeweler told me that hand engraving is the only way to get a deep impression, but that he knew no one still offering it as a service. This book will sit on my shelf as another technical reference on a subject that I will never pursue.
I did go to an engraver and have several parts done.
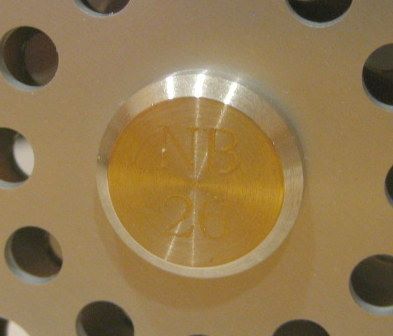
He did a good job, but as with previous machine engravings, the impression is not very bold. He told me that the engraving would not look very neat if done more deeply. I have dealt with four different jewelers on this matter, and the result is consistent: machine engraving can produce only a faint impression.
For a while I watched the Ebay auctions for pantograph machines. These go for $400 to $750 (with motorized spindle) and a font set is more than $100. To me, this is too much for a machine that only does one thing.
Leroy’s suggestion about electrochemical engraving has since become my interest. From what I see, this process causes a darkening of the etched area (why?) which gives contrast even though the etch may not be deep. A $60 machine is certainly in my ballpark. So I am going to pursue this option. My stencil will just be the letters “NB”, and I will stamp or otherwise mark the sequence number on an inside, hidden area of the reel.

Dave, I am looking for something to mark my reels also. Have you by chance thought of using the metal etch system that the knife makers use? Looks very inexpensive and will work on most metals including aluminum. http://www.northcoastknives.com/northcoast_knives_tutorials_Etching.htm
Very good looking reels.
Leroy………
Leroy,
That looks like a great system, especially with the supplier making stencils. The material that I am etching is nickel silver (12%), and I believe it is suitable for this kind of etch.
My problem is that I am set on doing a logo (or just the two letters “NB”) plus a serial/sequence number. So each reel would need its own new stencil.
At the moment, I am stalking Ebay for a pantograph engraver with a motorized spindle.
Dave
Dave, Let me know when you get one, as I will have some parts that I need to marked. Assuming that you want to do some outside work.
Leroy…..
Dave have you considered getting a graver (or gravers) at one sort of art store or metal engraving supplier and hand engraving the nameplate. Some quite nice work can be done that way. There would be a learning curve but the cost is inexpensive enough. For your work there has to be a nice font you can use. Check out the following.
http://www.cajunhandplanes.com/index.html
Rich,
I would really like to be able to do this type of work. No doubt there is a learning curve, but I would not expect to overcome it without some native artistic talent.
Did you see this one: http://reelsmithing.com/forum/viewtopic.php?f=10&t=396
The screw head that I want to engrave provides only an 0.5 inch diameter area; not much room for decoration.
Dave